
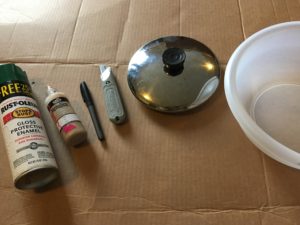
 This art is easy and super cheap to make. I love the how the 3D effect of weaving the cardboard pieces together really makes it pop. Although the design looked complicated, all you need are four cardboard U’s, glue, a utility knife, and paint.
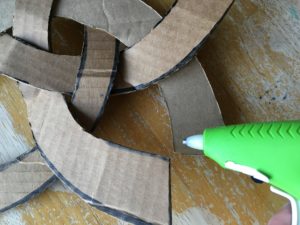
 When creating a template for your cardboard U’s, keep in mind that the wider the U-shape is, the easier it will be to weave. Using a popcorn bowl for a guide works well.
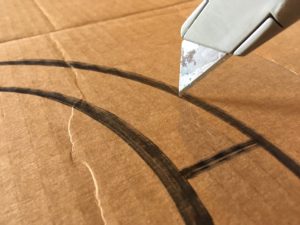
 Trace and cut out one piece using the circle guides (I used the popcorn bowl for the outer circle and pan lid for the inner circle) and then make 3 more “U” shapes from the first piece. Once they are all cut out, it’s time to weave them together. This can be a little bit tricky, but you can do it.
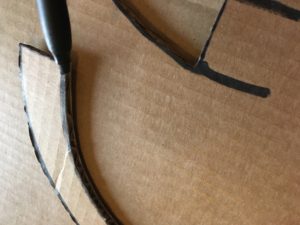
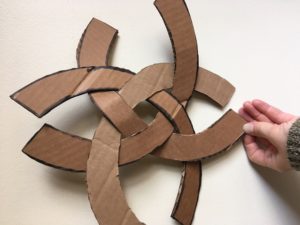 If you look at the design, you will see how they are woven together. Start with opposite sides. One “U” will go over the top of the other “U” and under the bottom of the other “U”. Then the third “U” weaves over one side “U” and under the other side “U”. The fourth “U” weaves over-under-over-under the other three, to complete the design.
 Once your pieces are woven together, you can pull the ends out to secure the design. You will want to glue the ends to connect them. Hot glue works very well for this kind of project, and again, you’ll want to start with opposite ends. Be sure one side is cool before gluing the opposite sides.
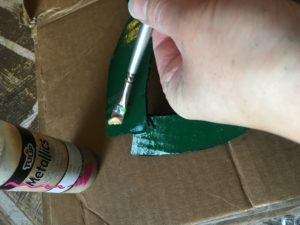
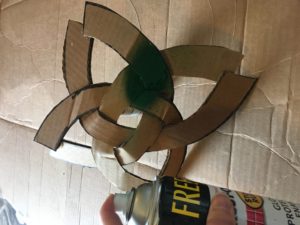 Once your design is intact, you can paint it! You can use green spray paint to give it a nice, even coat for a base. For the finishing touch, add a little gold metallic paint around the edges to accentuate the overall look. Whalah! Ready to dance a little jig? Me too!
 Art is about doing what you like, experimenting, and having fun. Feel free to use this idea, but if you get a better one along the way, take the risk and invent it!
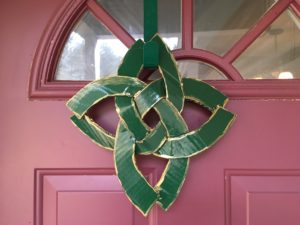 Happy St. Patrick’s Day, Inventor!
Welcome inventors! This past week was spring break, and to celebrate I bought a box of springs. After brainstorming with my kids, we created our own spring-action race car launchers and gate. Check it out!
Here’s how we did it: First, we gathered all of the same size springs together. You could experiment with different strengths and sizes of springs, but in the spirit of good sportsmanship, we opted to keep them the same for racing. We used these materials and painter’s tape.
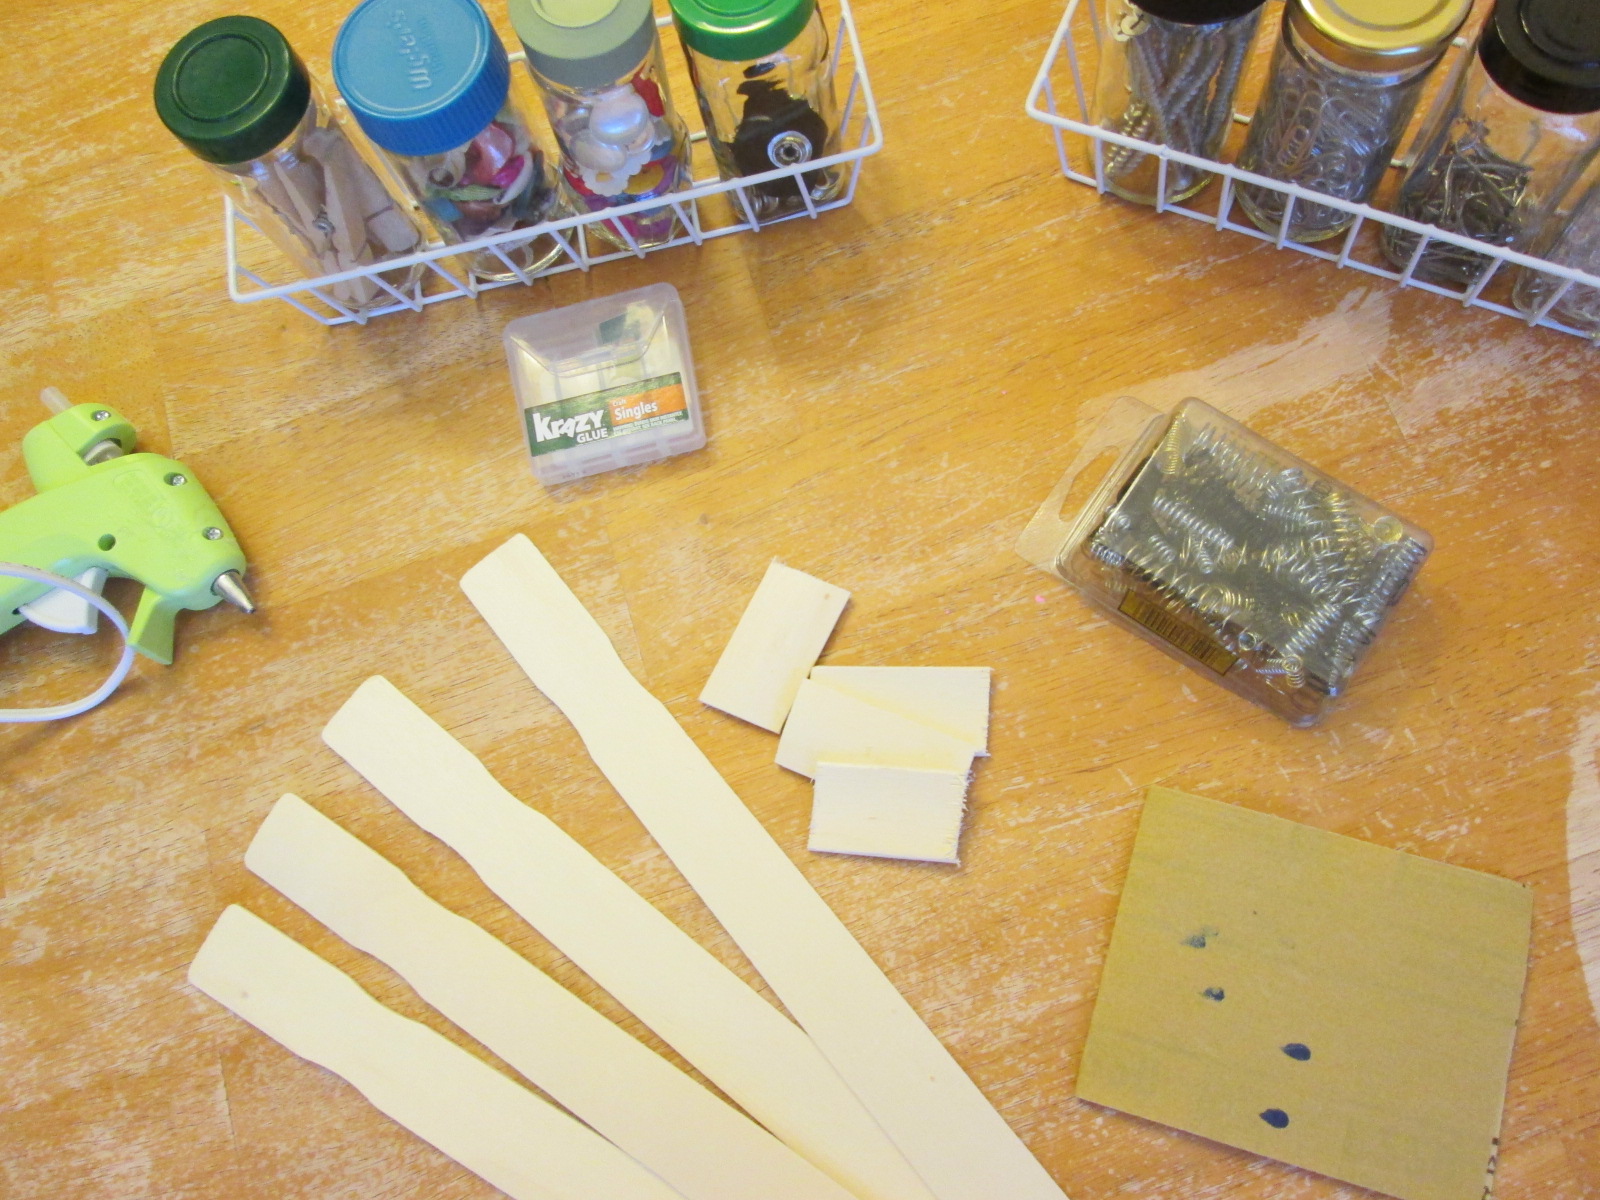
To make the launchers, we cut a paint stick into small pieces and sanded the edges. Then we super-glued (and doubled security with hot glue) the springs onto the back of our paint stick pieces. Launchers!

After that, we needed our starting gate. We ran out of hot glue, so we used painter’s tape to frame the sticks into stalls. This wasn’t hard, but the sticks moved quite easily.
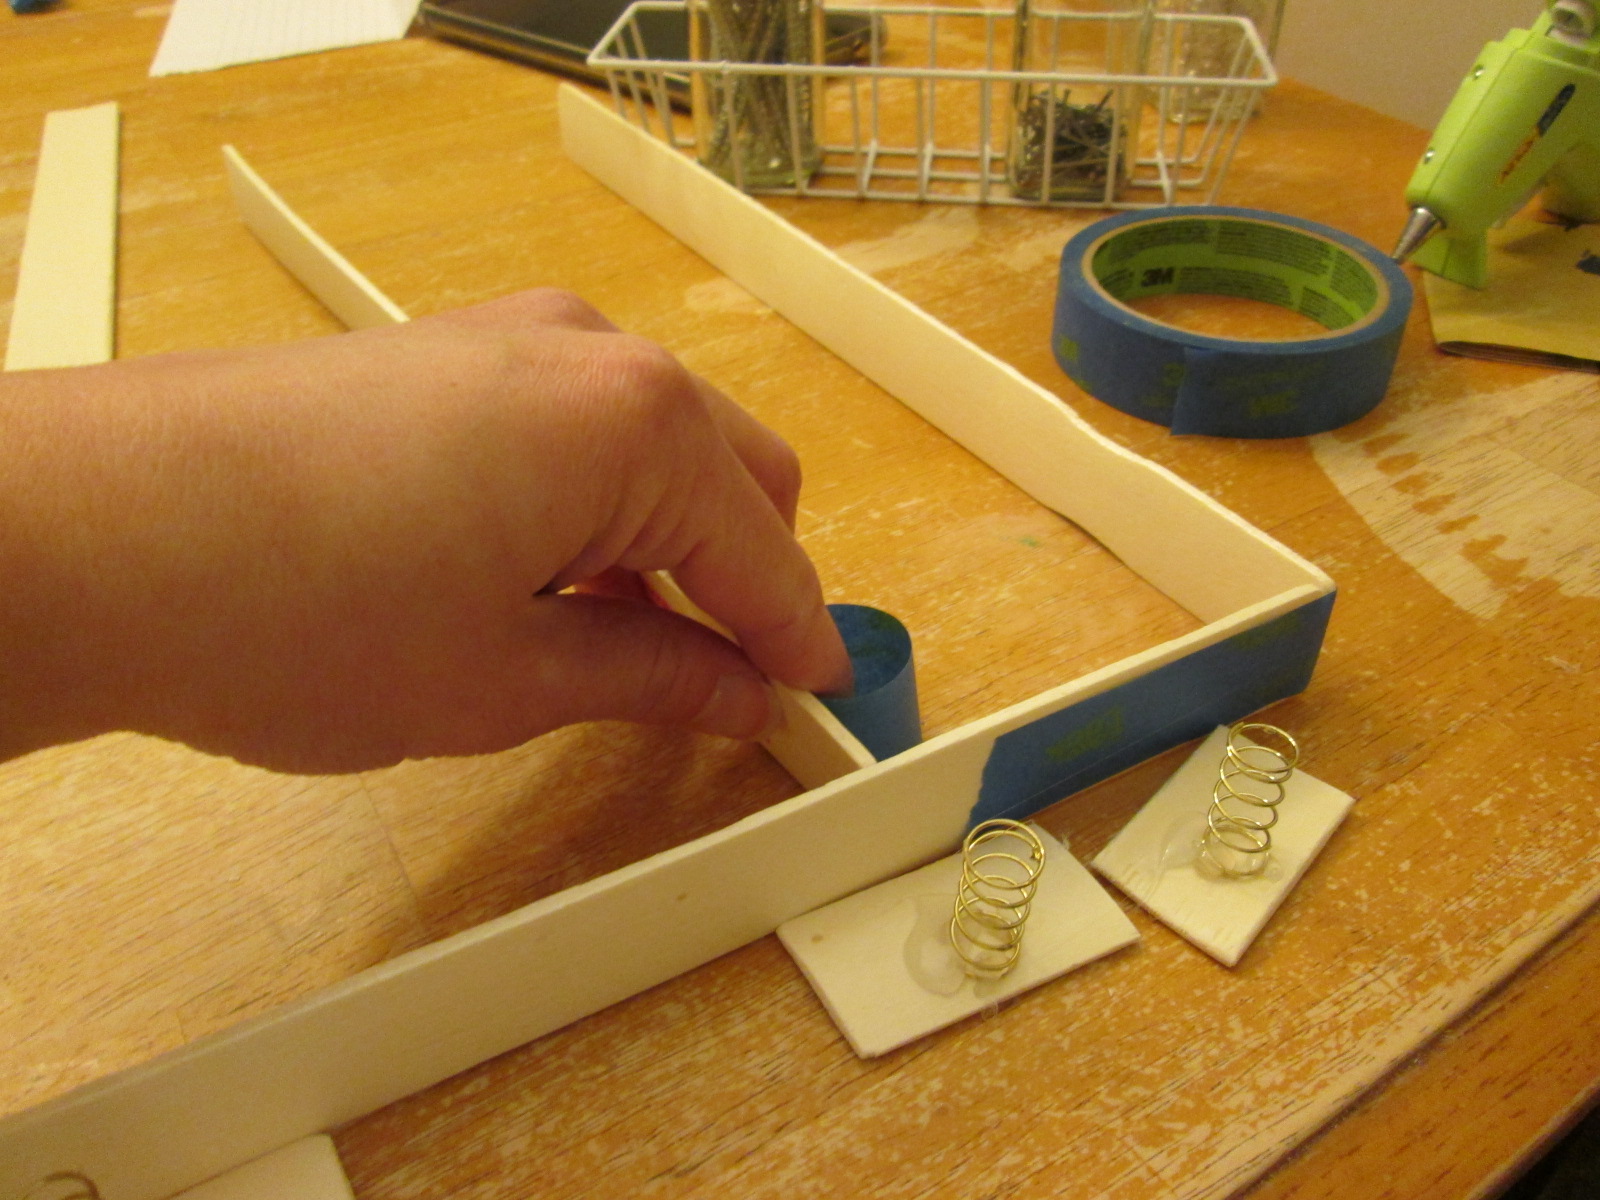
The ends of the stalls were floppy, so we secured two screws together that faced opposite directions to the end of the starting gate to keep them equally separate. This is shown in the video at the end. We also taped the outside walls to our table.
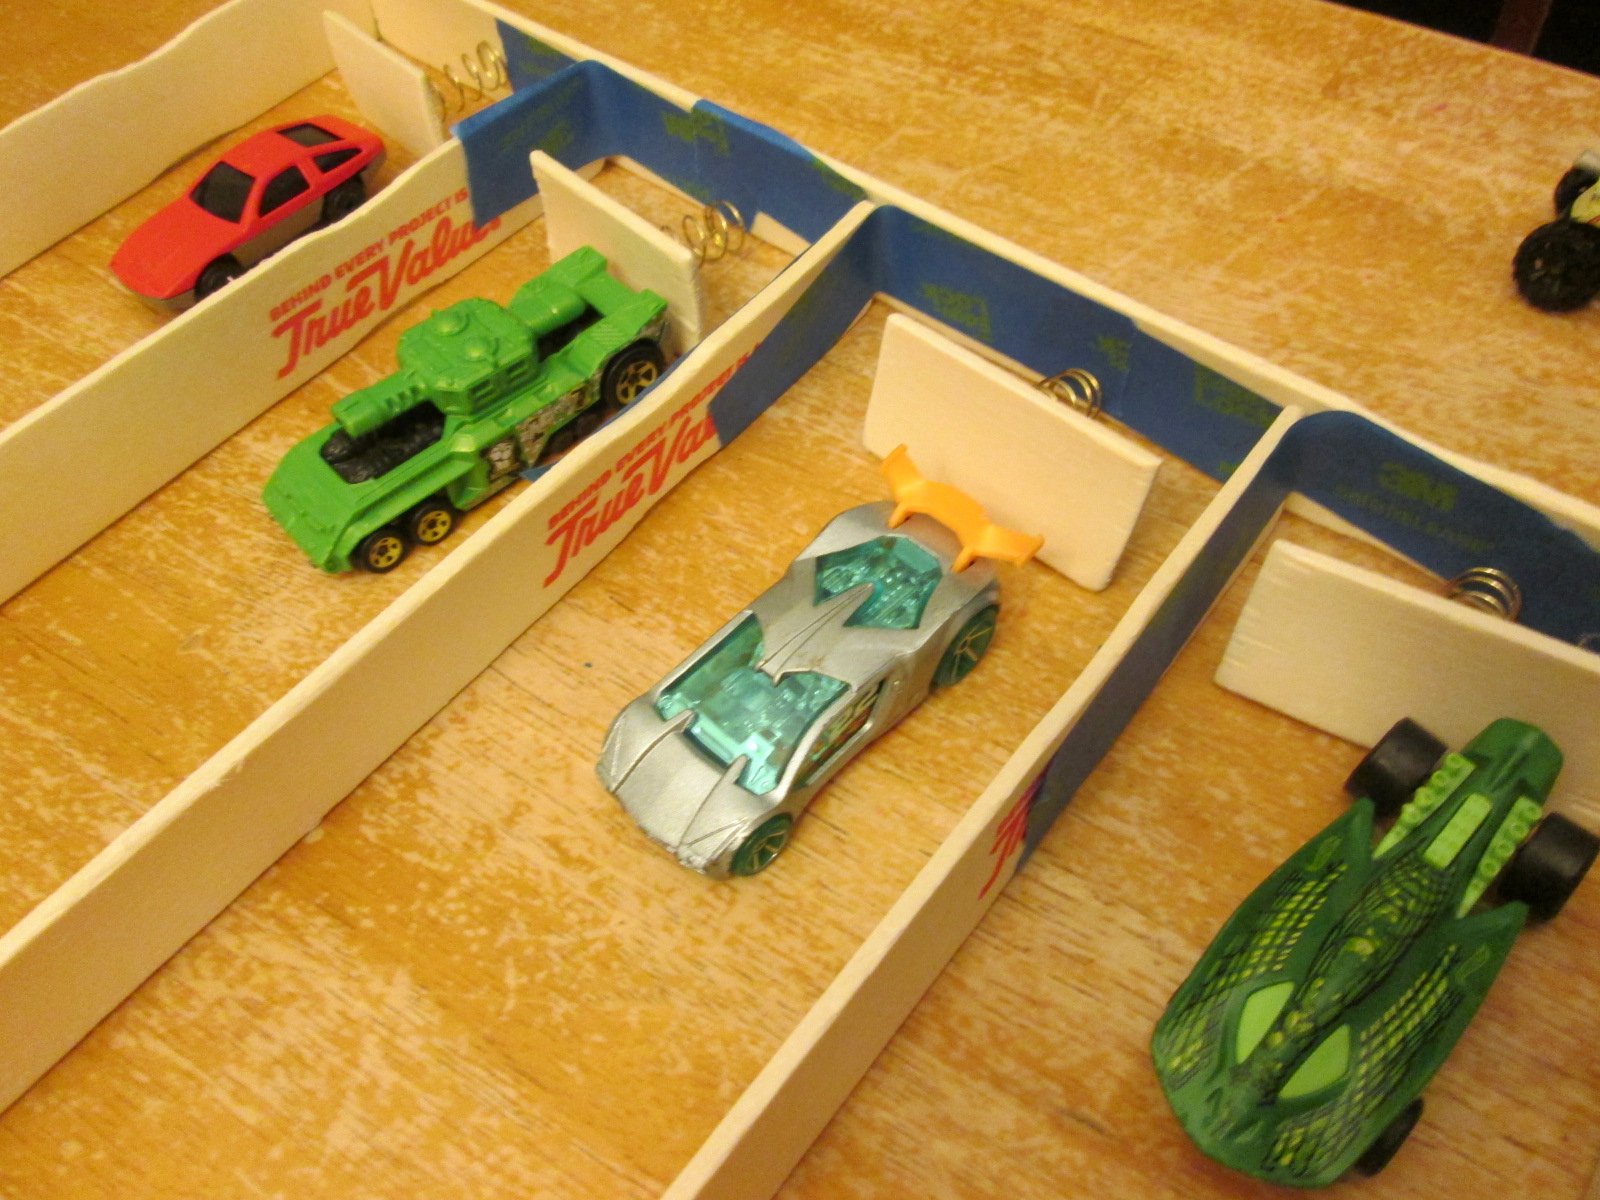
Ready, set, launch! For our race, we used more painter’s tape to create a finish line for the winners. We also experimented with some interference for our race cars to navigate. My son made a display for our winning cars.
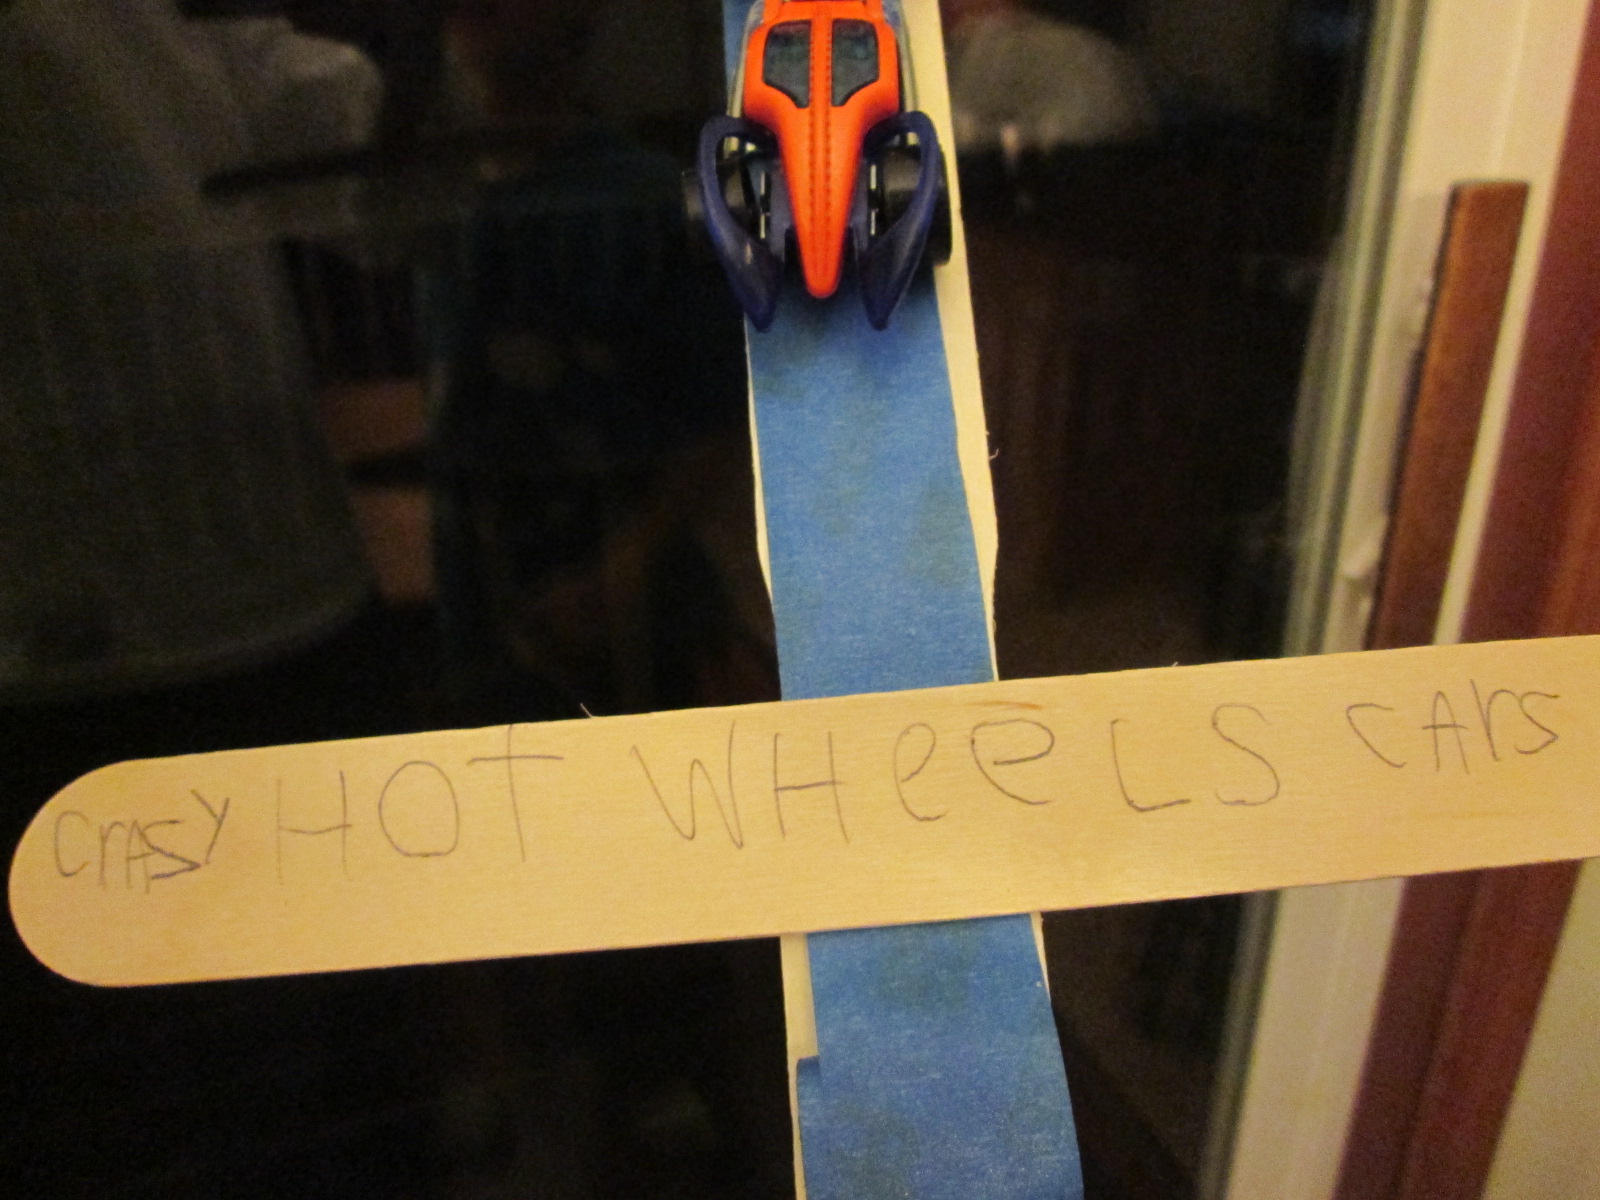
I think it turned out pretty well! Here’s our big race. Give it a try and see what you think. And whatever you do this spring, don’t forget to enjoy life and invent your story.
[wpvideo qbuoza9t]
Welcome Inventors! Today I am taking a break from inventing to get organized. Messes are more fun – at least that’s my motto. Look at the pic of my first blog about inclined planes if you don’t believe me! That mess was not part of the project – it’s just how we roll some days.
If you are like me, you may not be known for organization – but you can appreciate the value of knowing where things are and where they go. This saves you time, and time is valuable. Let’s invent some space!
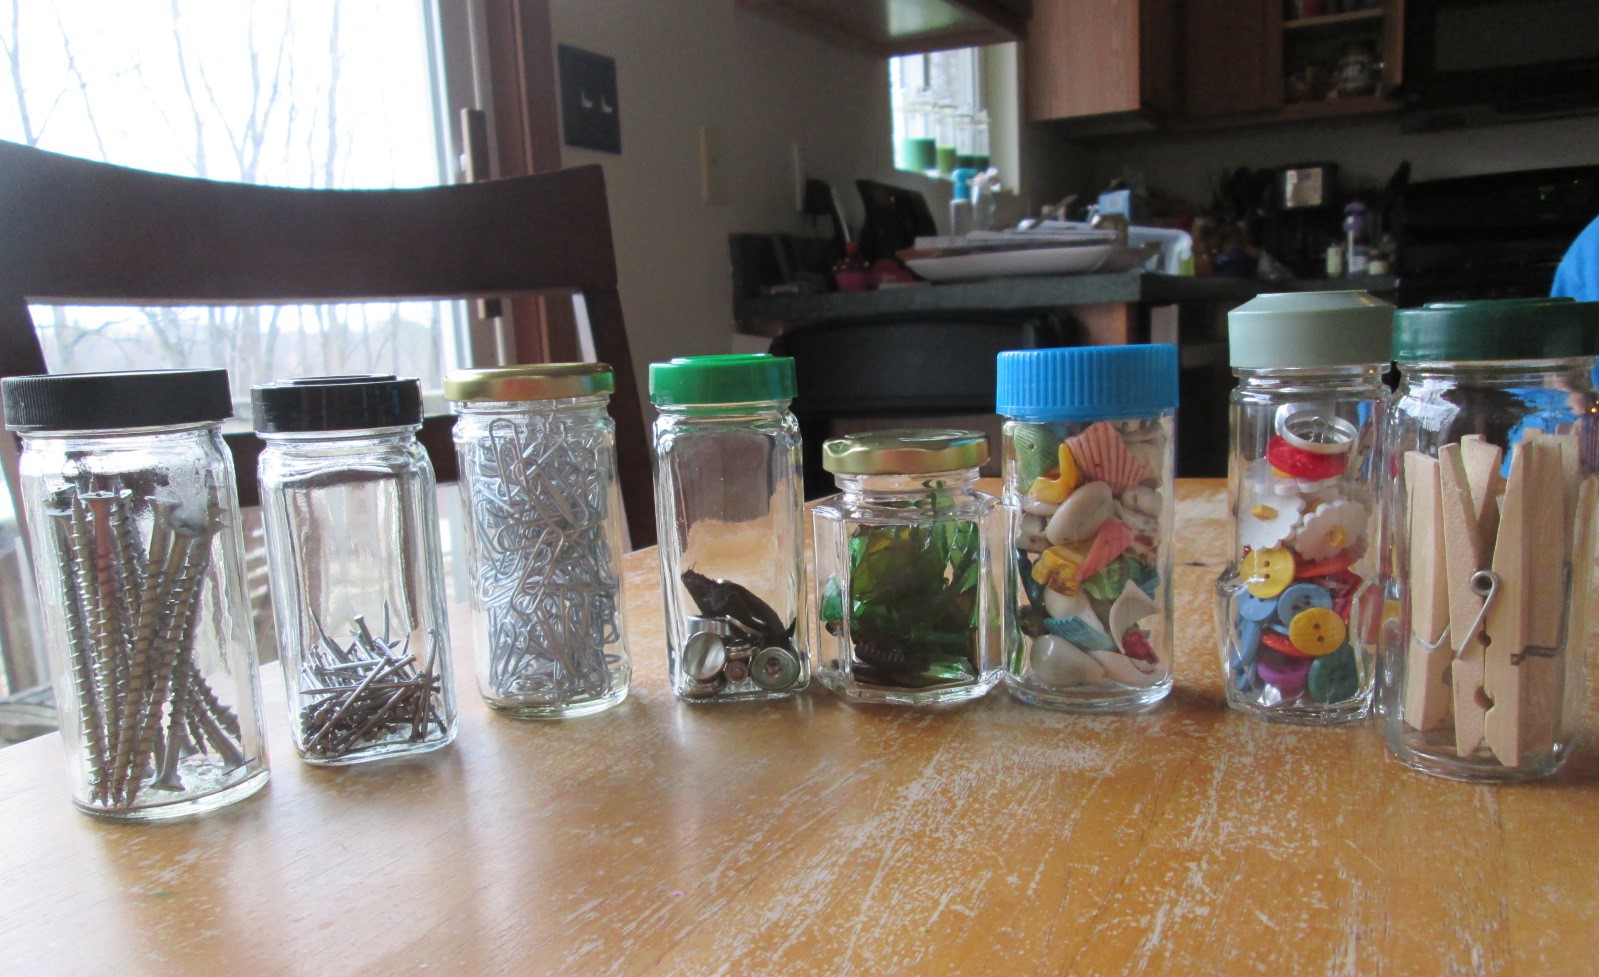
- START SMALL: If you’ve ever bought office supplies, hardware or craft materials (very useful for inventors) you get hundreds of little pieces. And that’s nice – except what do you do with the 99 pieces you don’t need for your current project? Get that stuff together, and take a deep breath.
Once you’ve collected your little things, the next step is putting them into containers.
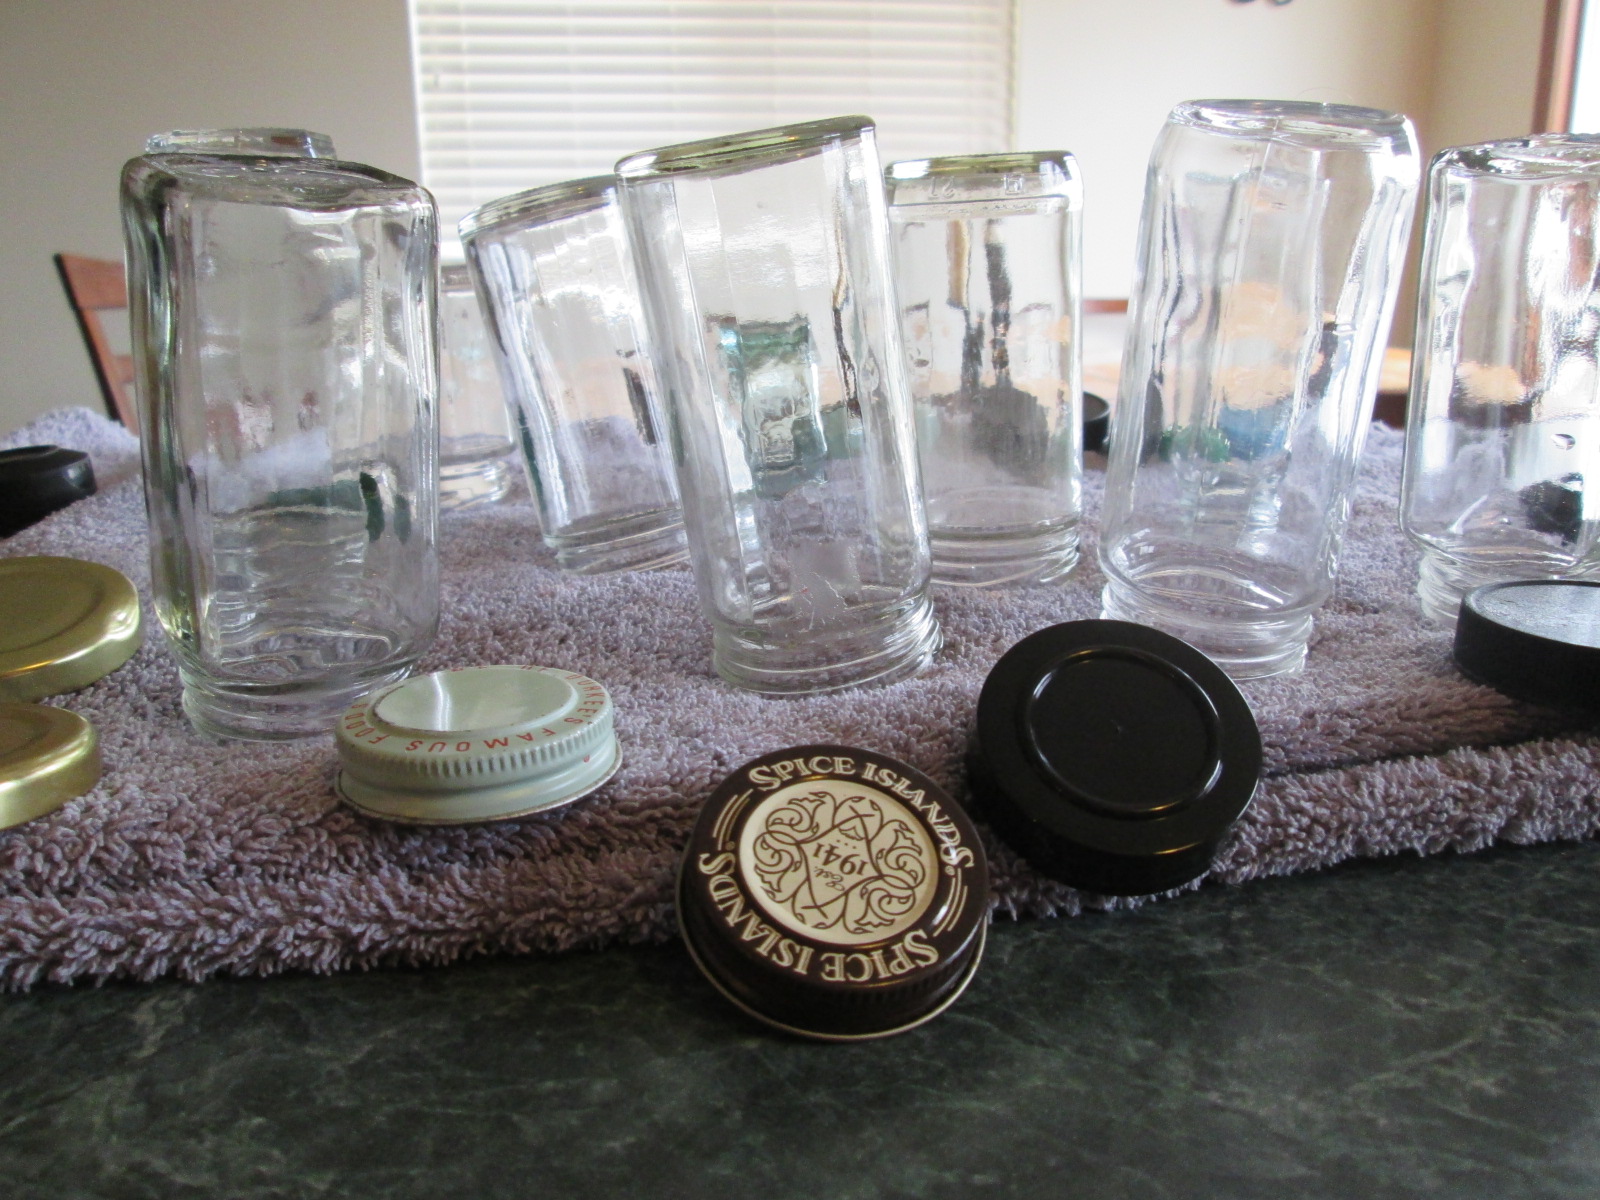
- IT DOESN’T MATTER WHAT YOU PUT IT IN: That’s right. You don’t need to take a special trip to the store. You can, but why not re-use old containers? This weekend my mom and I went through some spices to see what was still good – and it turned out many of them had been expired for years.
I dumped out the spices and let the containers soak in a sink of hot water, dish soap, and baking powder. Most of the labels came off easily after the bath. I set them out to dry on a towel.
- KEEP THINGS TOGETHER: After I filled my spice jars with my little pieces, I put them in wire containers. This is completely unnecessary, but grouping your supplies together and keeping them in the same place will save you frustration later. You might even call it an Inventor’s Workshop.
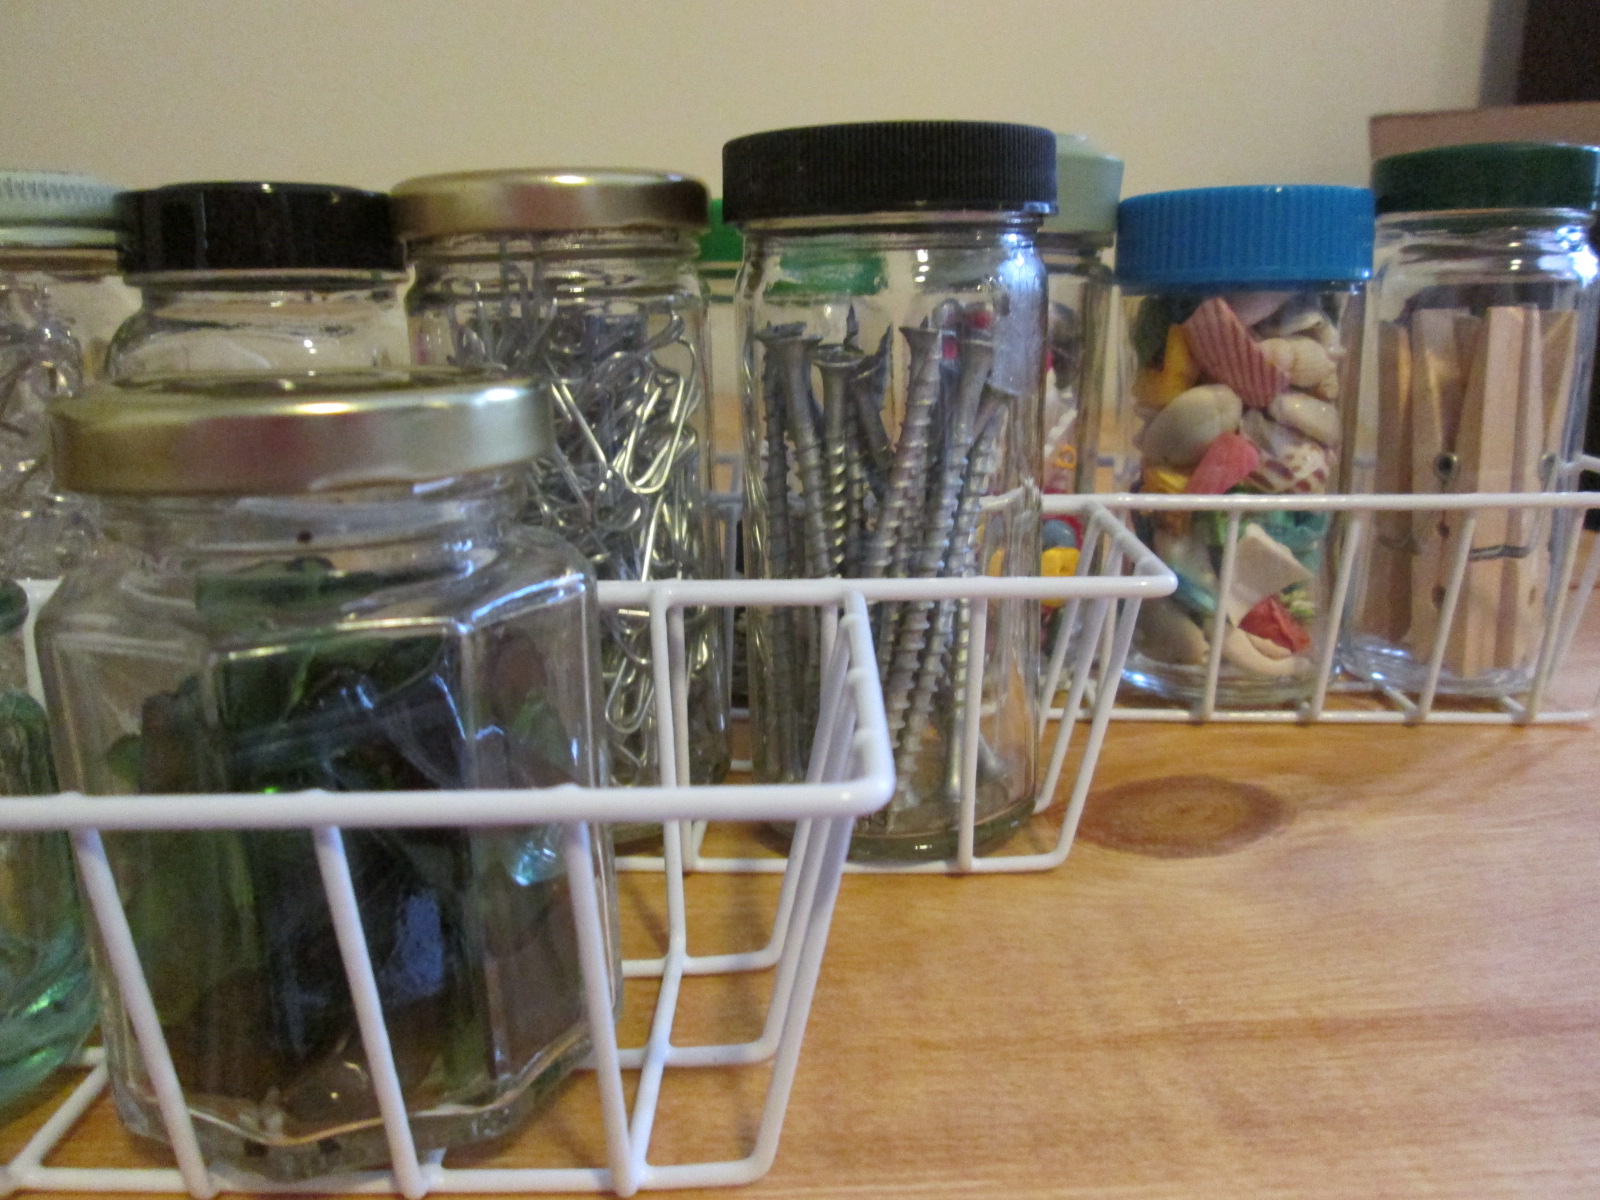
There you go! You’re on your way to your own inventor’s workshop. This is probably the world’s smallest workshop, but I have no doubt that this baby is gonna grow. After all, we’ve only just begun.
Let me know how this was helpful for you. Thank you for visiting my site, now go! ???? Enjoy your day and invent your story.
Welcome Inventors! I’ve always been interested in language. When I was in elementary school, my friends and I formed a club and made a secret language just for us. No teachers were going to understand any notes we passed!
Step 1: Knowledge – what is a code? A code is a system of rules used to turn information (such as letters, sounds, images, etc.) into another form of representation for communication.
Step 2: Simple Application – a wonderful example of code is International Morse code. Almost anyone could recognize this picture and be able to understand the message.
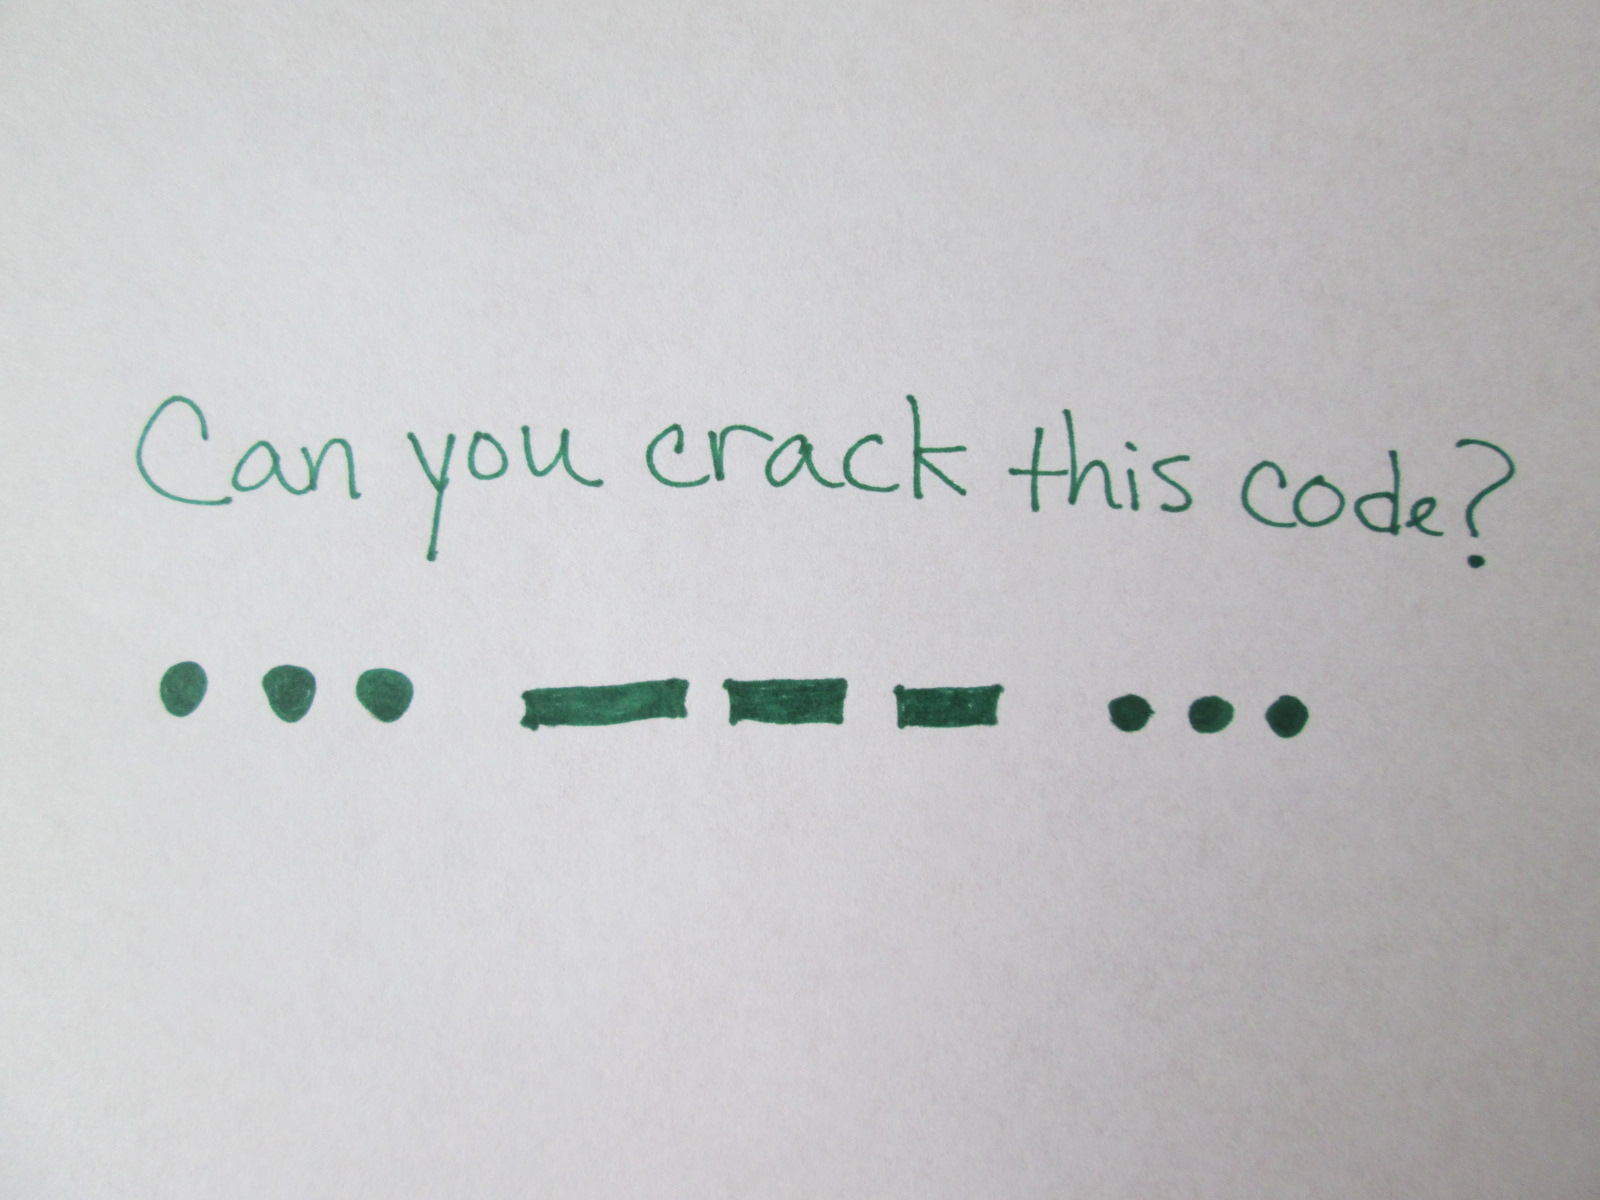
S=••• O= – – – SOS is essentially “help!” in International Morse code. This is a useful tool in a world full of different languages! If you are interested, click here for some great information on the history of Morse code.
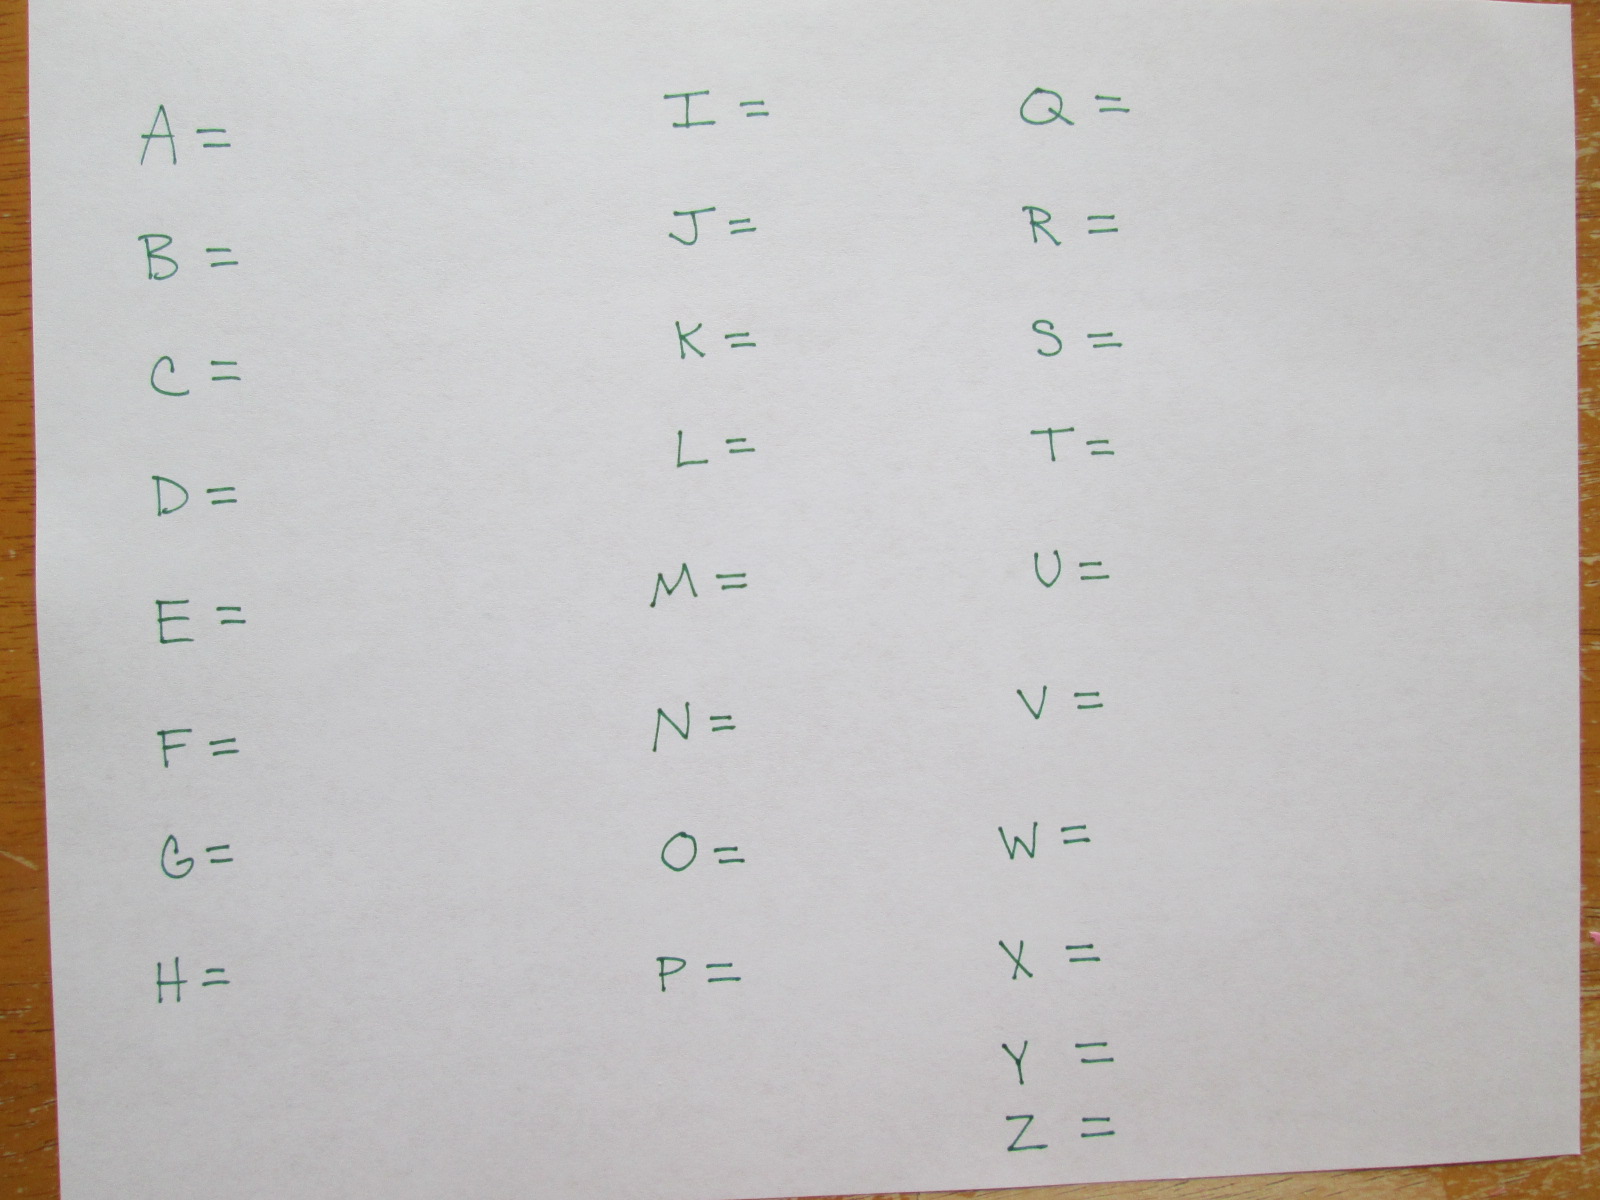
Step 3: Level up – To make our own code today, we need a system of rules and information. I’m going to use letters because I like to make words. Here is the “key” to my code before I begin:
Step 4: Build It – to create your code, make a few designs on a piece of paper. If you want to copy mine you can, but try your own thing! I did find that simple shapes with small details worked well for me.
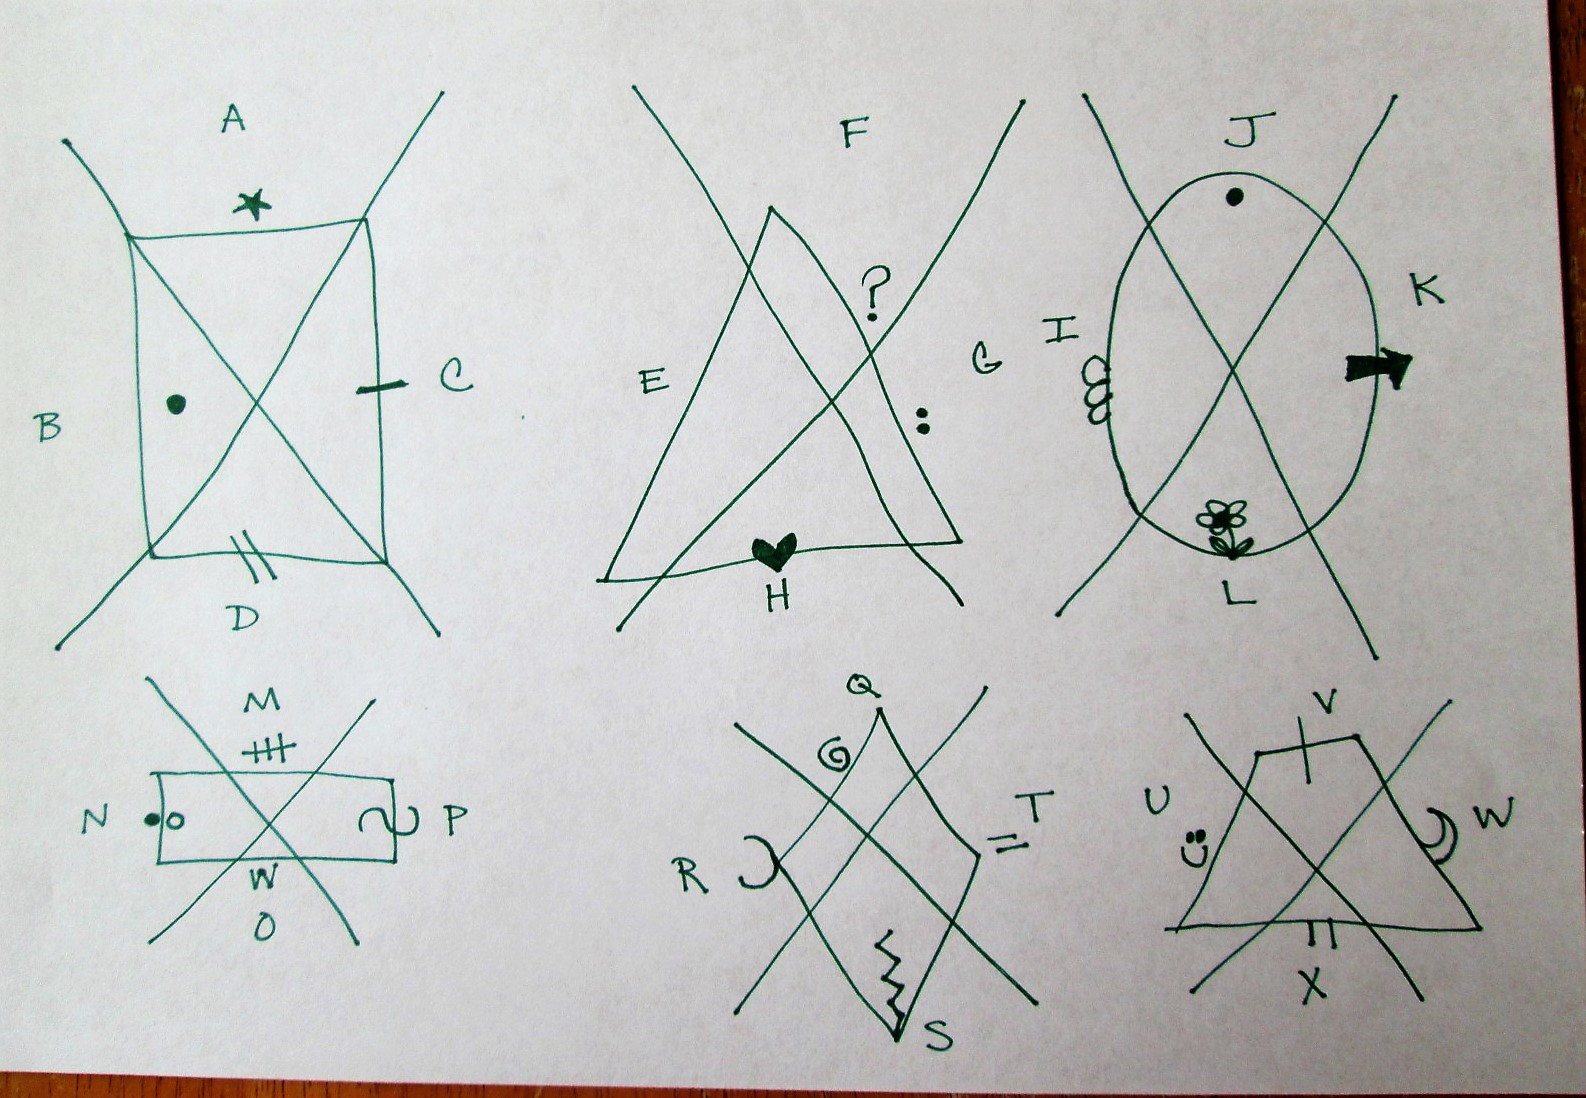
Step 5: Launch – To turn your design into code, place X’s over your designs. You could also divide them into quadrants with + signs or squiggle off your favorite parts. This gives you the pieces of your code. Once you have what you like, add them to your key next to the letters, and BAM – you’ve invented your own secret code! (I made up Y and Z instead of drawing another shape – you do what you like!)
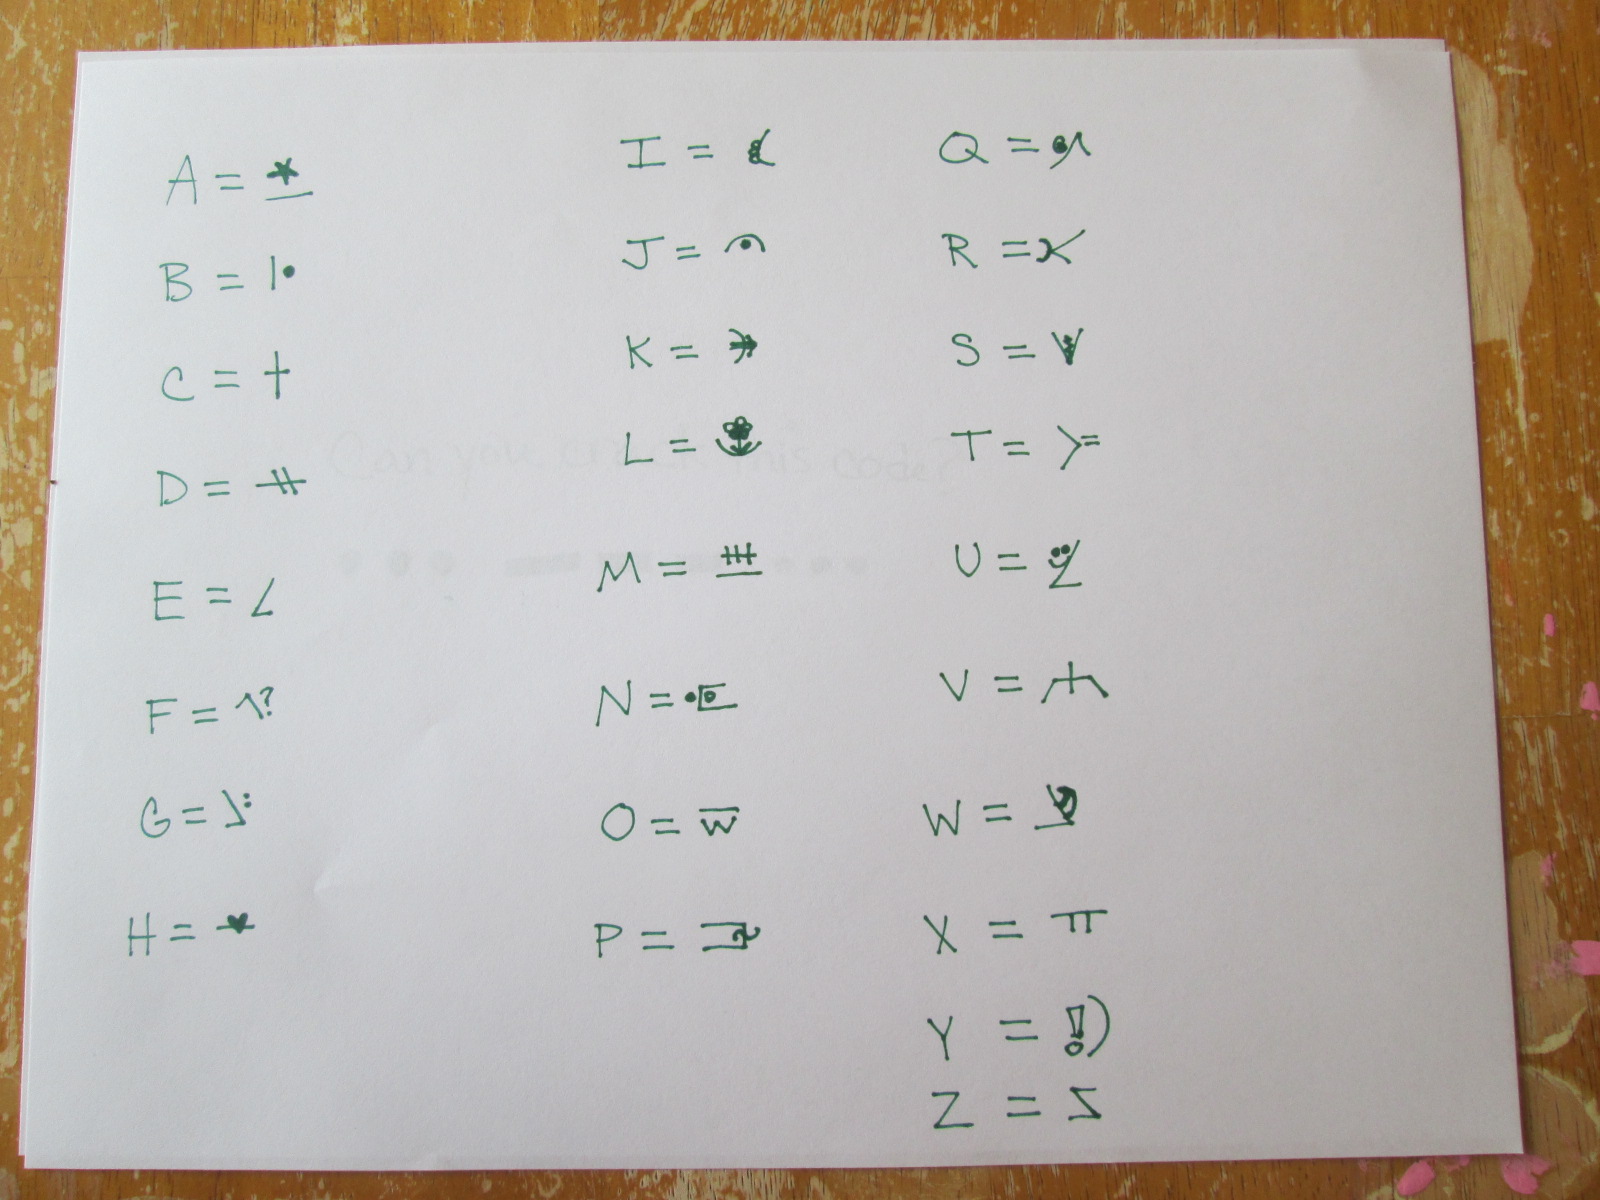
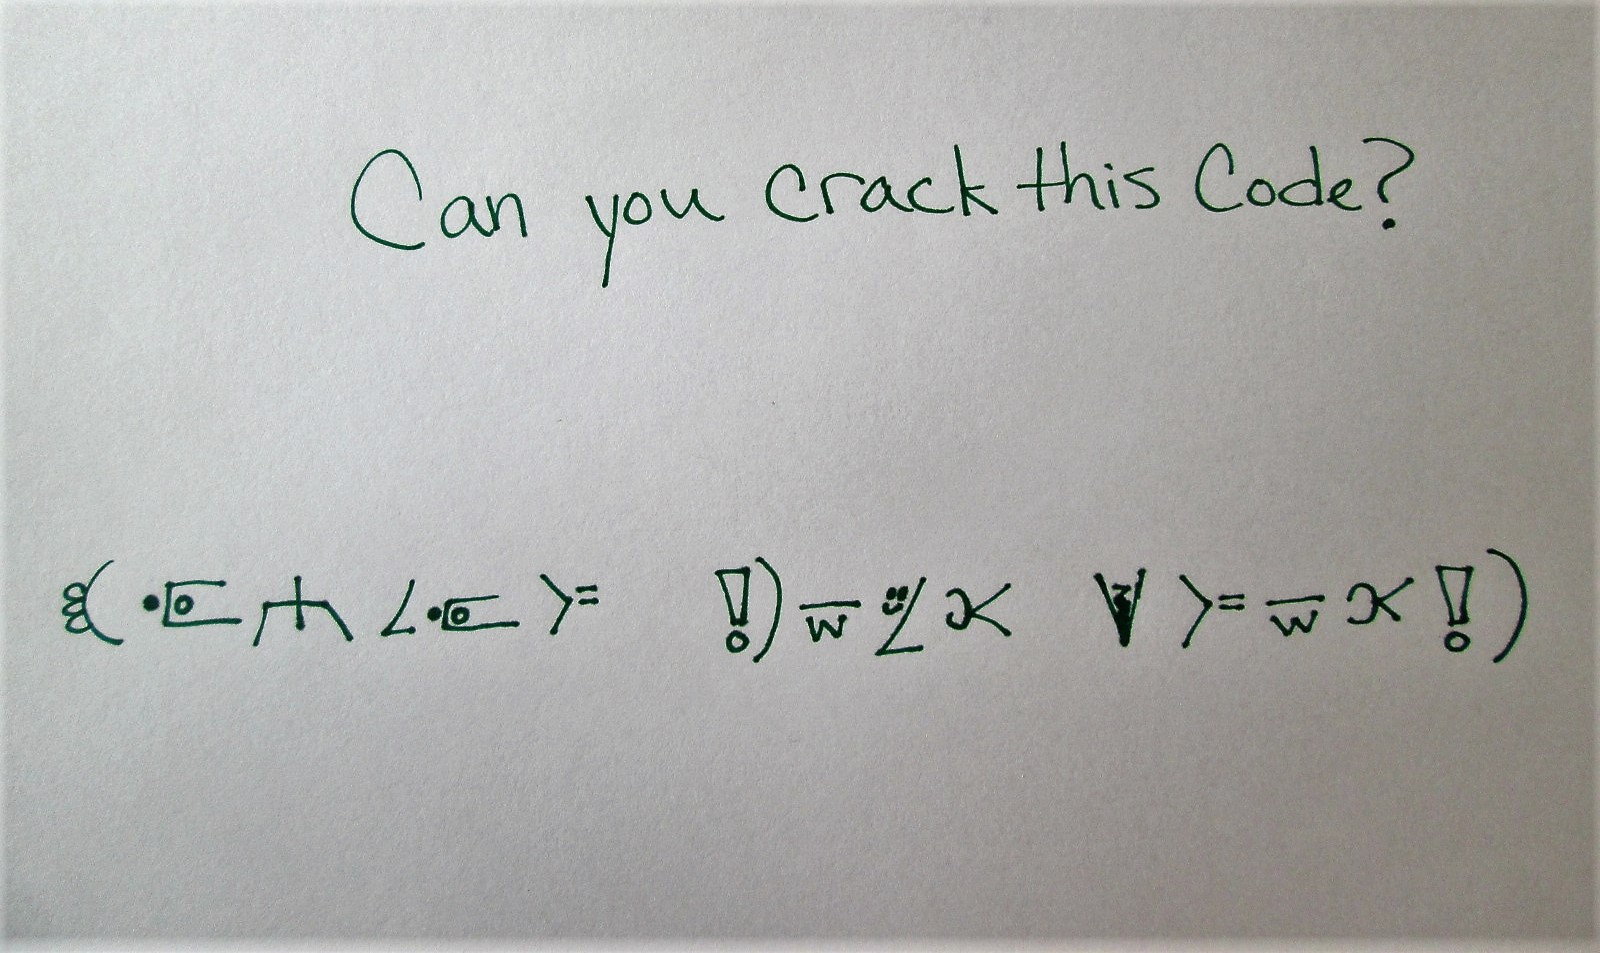
There you have it! Your own secret code to share with family and friends. Now that you know my code, I’ve got another challenge for you. Then go! Enjoy your day and…
Welcome Inventors! I have a 10-year-old son who an origami enthusiast. Last week, he showed me a boredom buster box he made. You have got to try this!
If you are new to making origami, the box is a doable first project. Go slow and pause/replay the video as needed. This is a 5-step tutorial. Let’s get started.
STEP 1: KNOWLEDGE – what is origami? Origami is the Japanese art of folding paper into decorative shapes and figures. To make the box, you will need 6 pieces of square paper.
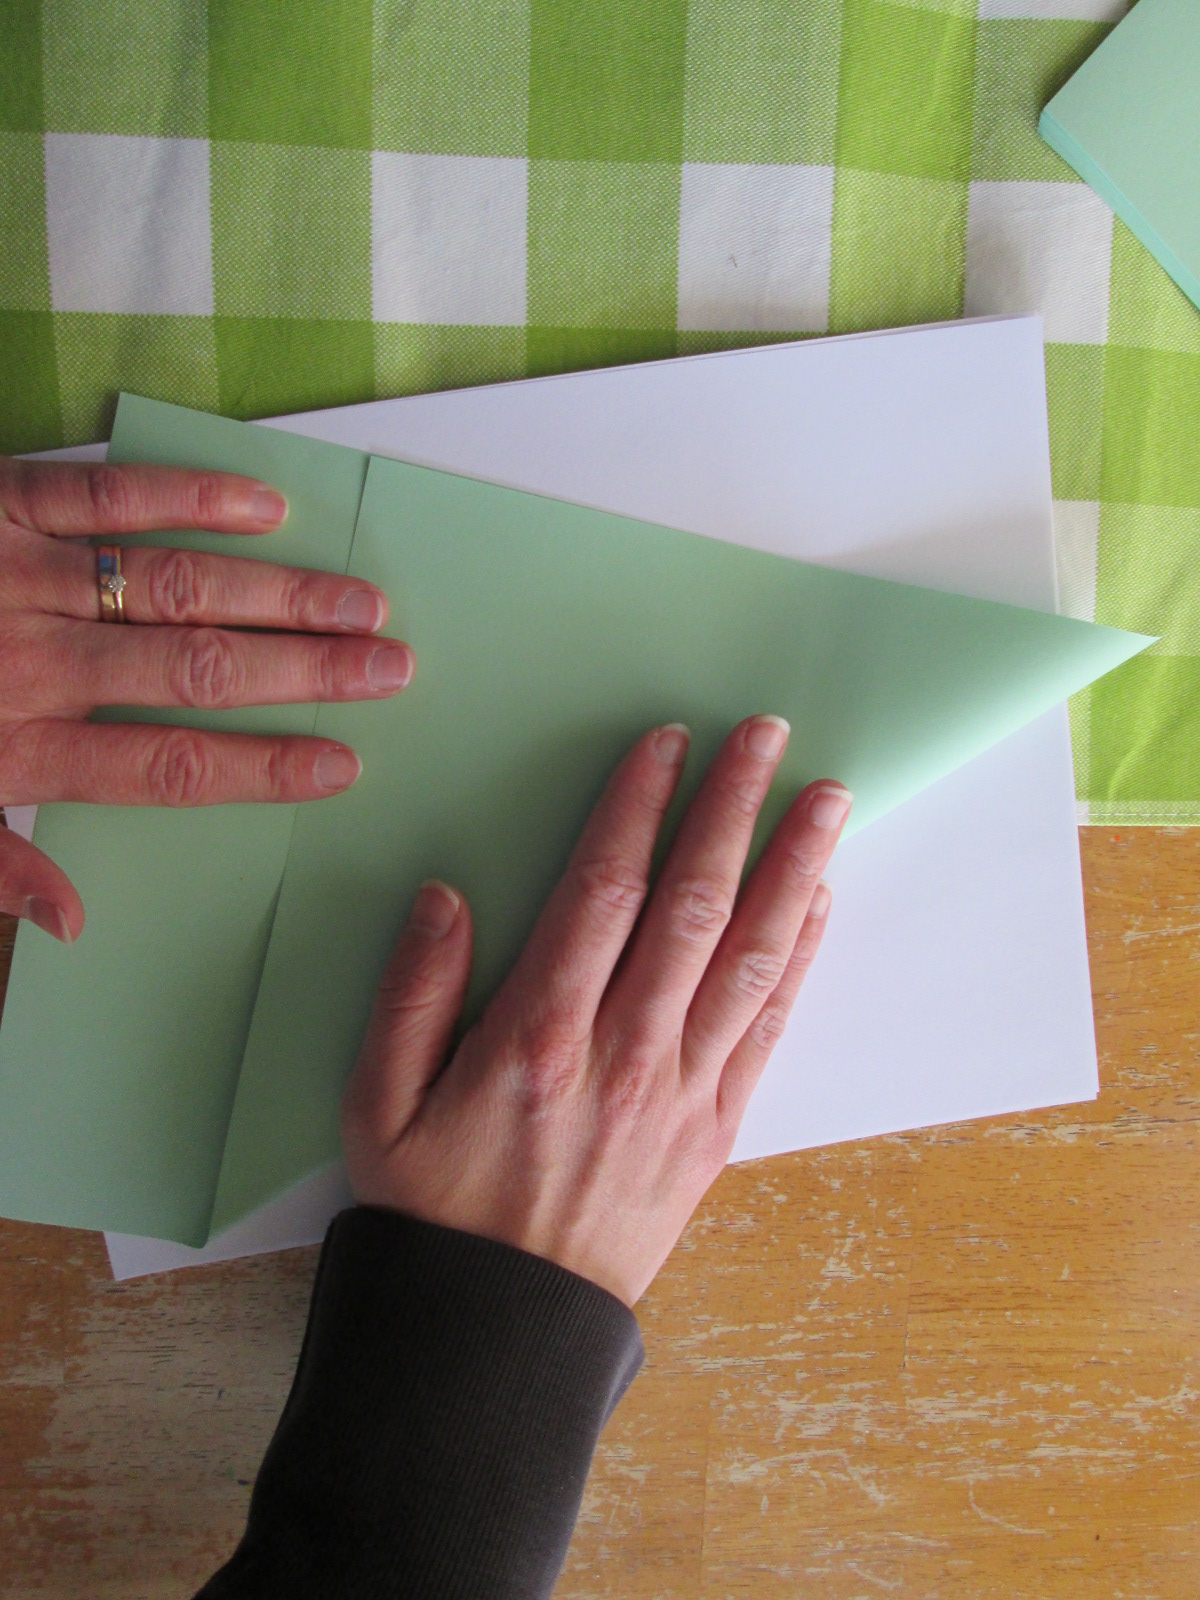
I squared my paper by folding a top triangle down of a standard size piece of paper (8 ½ x 11 – as shown) and I tore the extra off. You can also cut the paper into 8 ½ x 8 ½ inch squares.
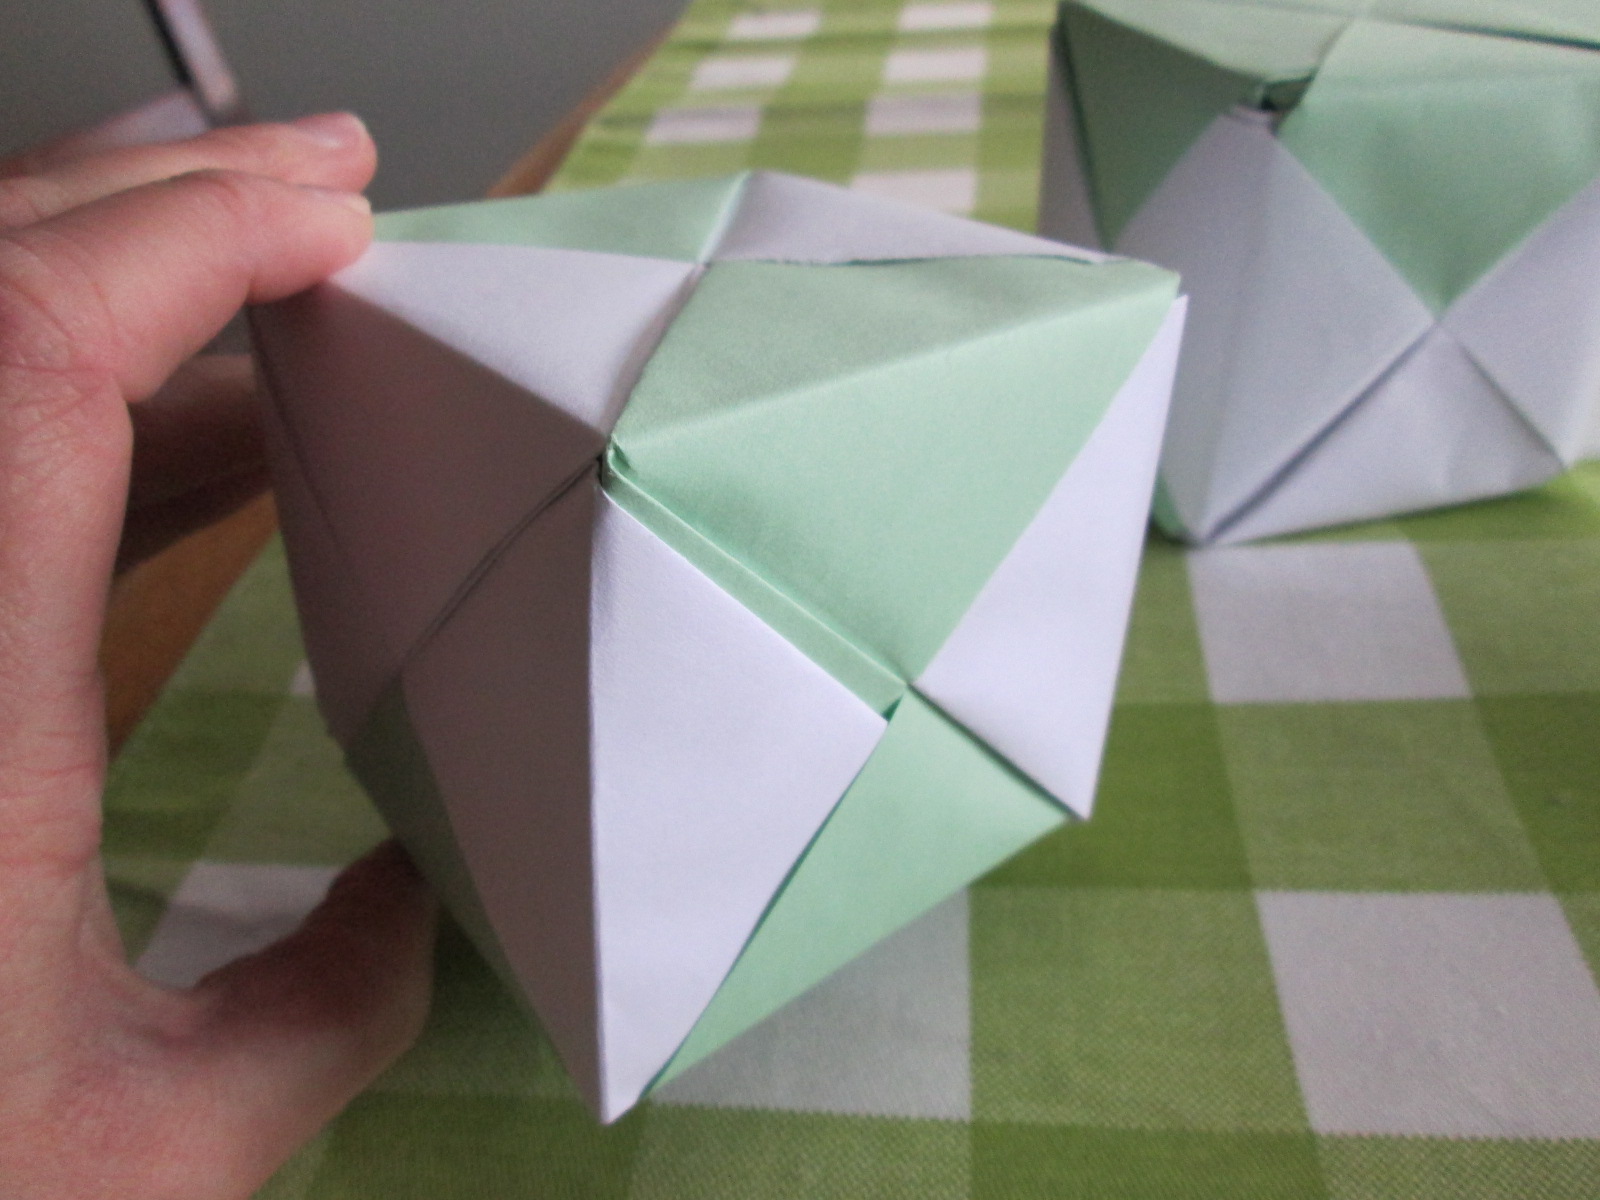
STEP 2: SIMPLE APPLICATION – follow the steps of this link to make the box. This video was not made by me or my son and it is an excellent guide! When Ben and I watched the video, we had our six papers all set to go before we began, and it took us about 10 minutes.
This wonderful, 3-minute video by VENTUNOART shows how to make this box. Click HERE to watch the video. You can do it! When I was done, my box looked like this:
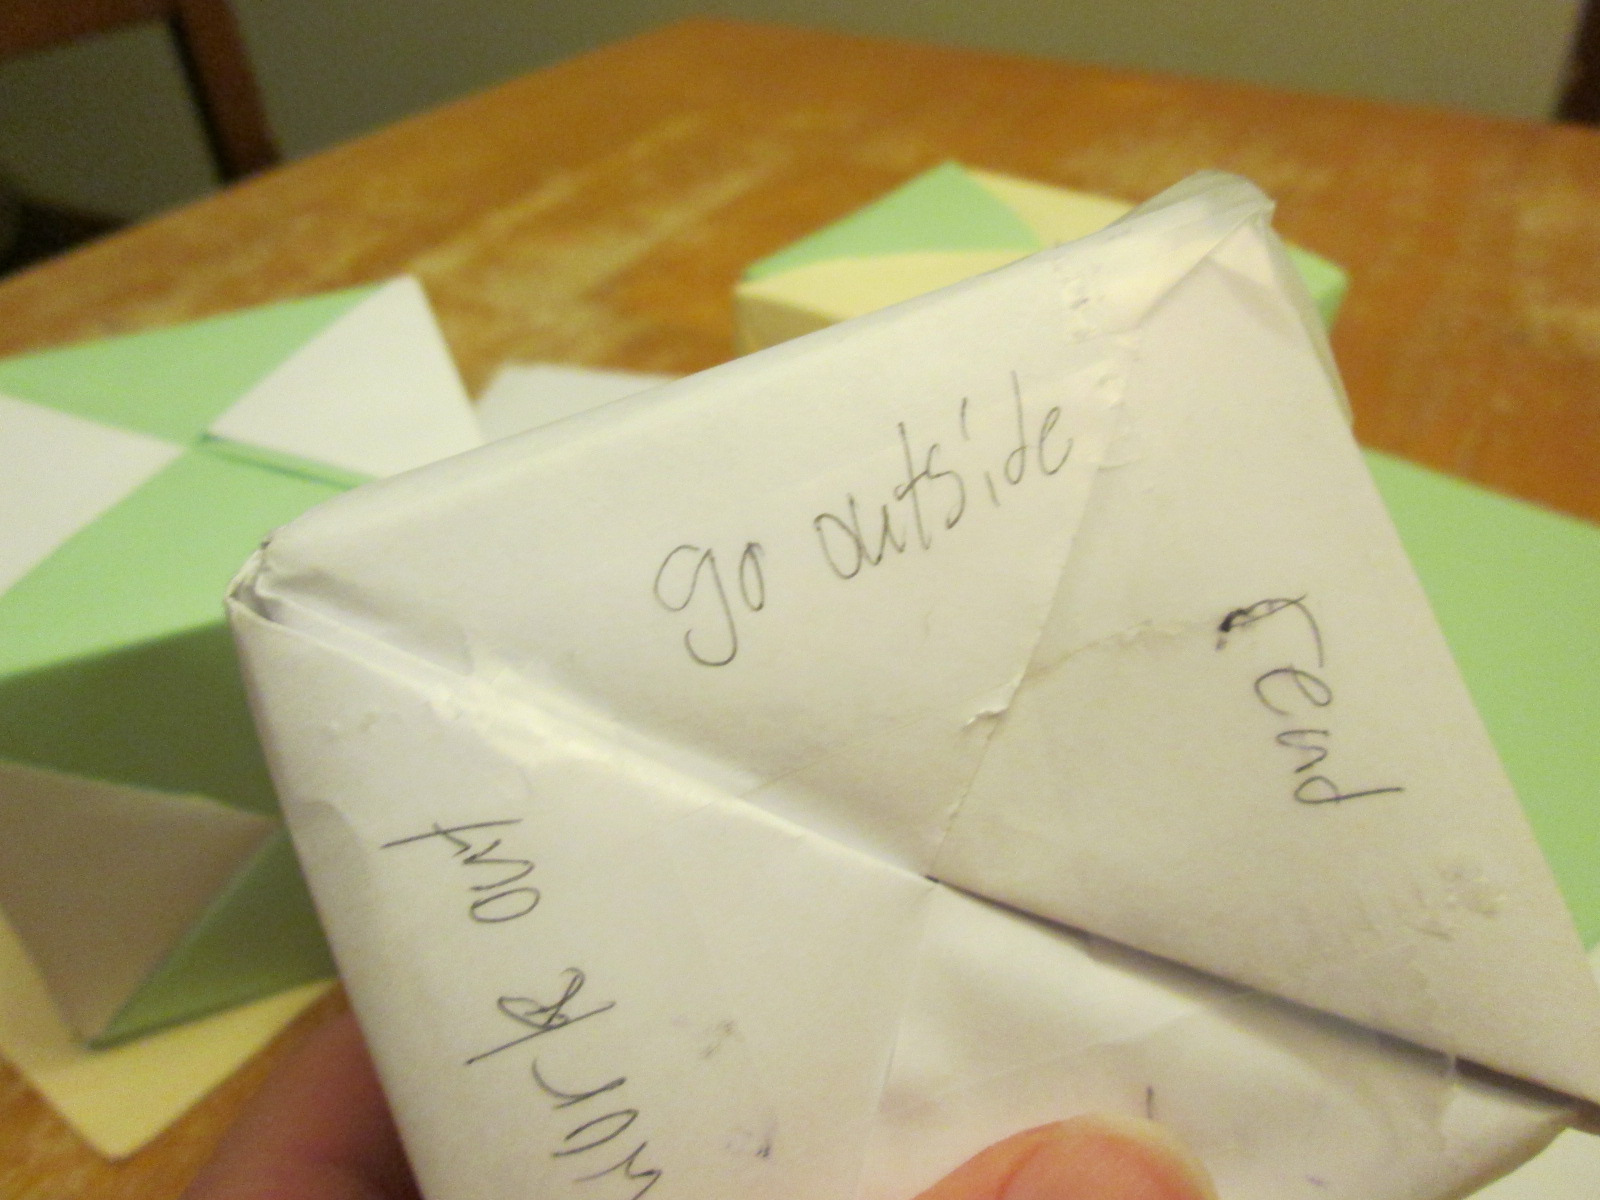
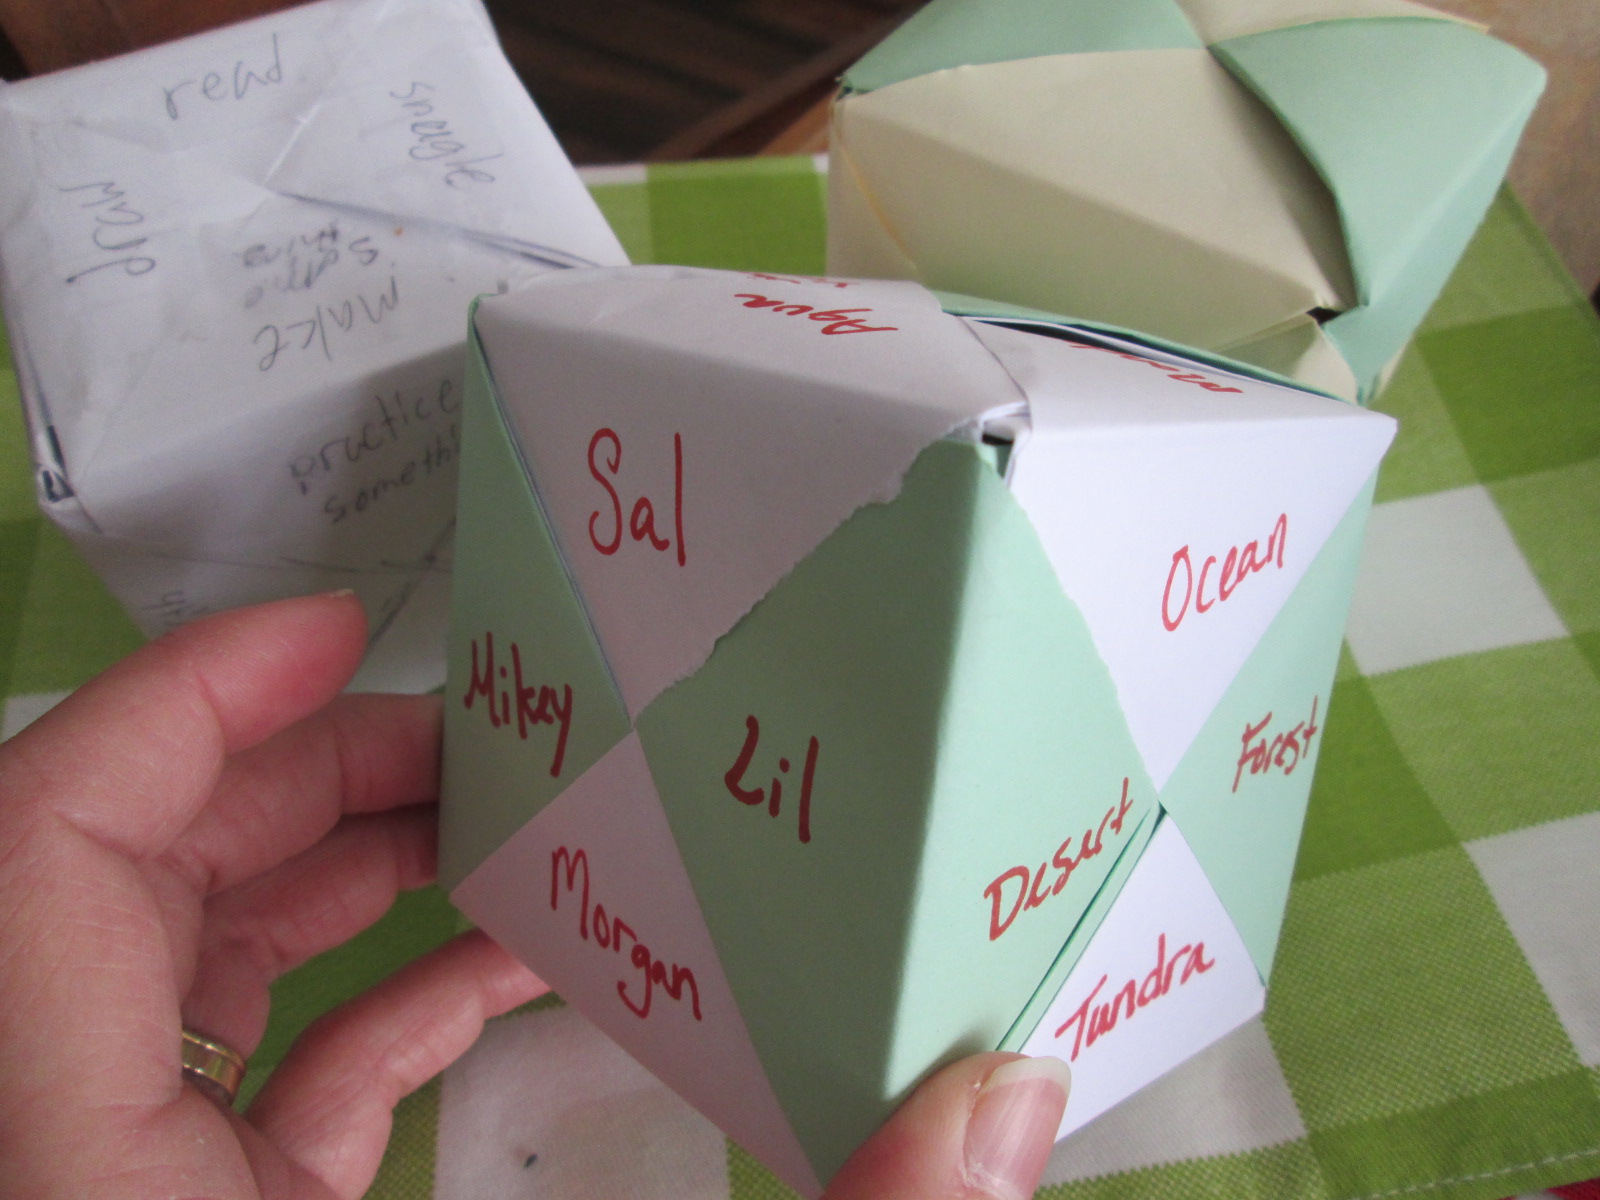
STEP 3: LEVEL-UP – I love learning new things, but what really jazzes me is learning something new and then finding a way to make it my own. Ben turned this work of art into a game by writing ideas of things to do when he is bored on the triangles on each side of the cube.
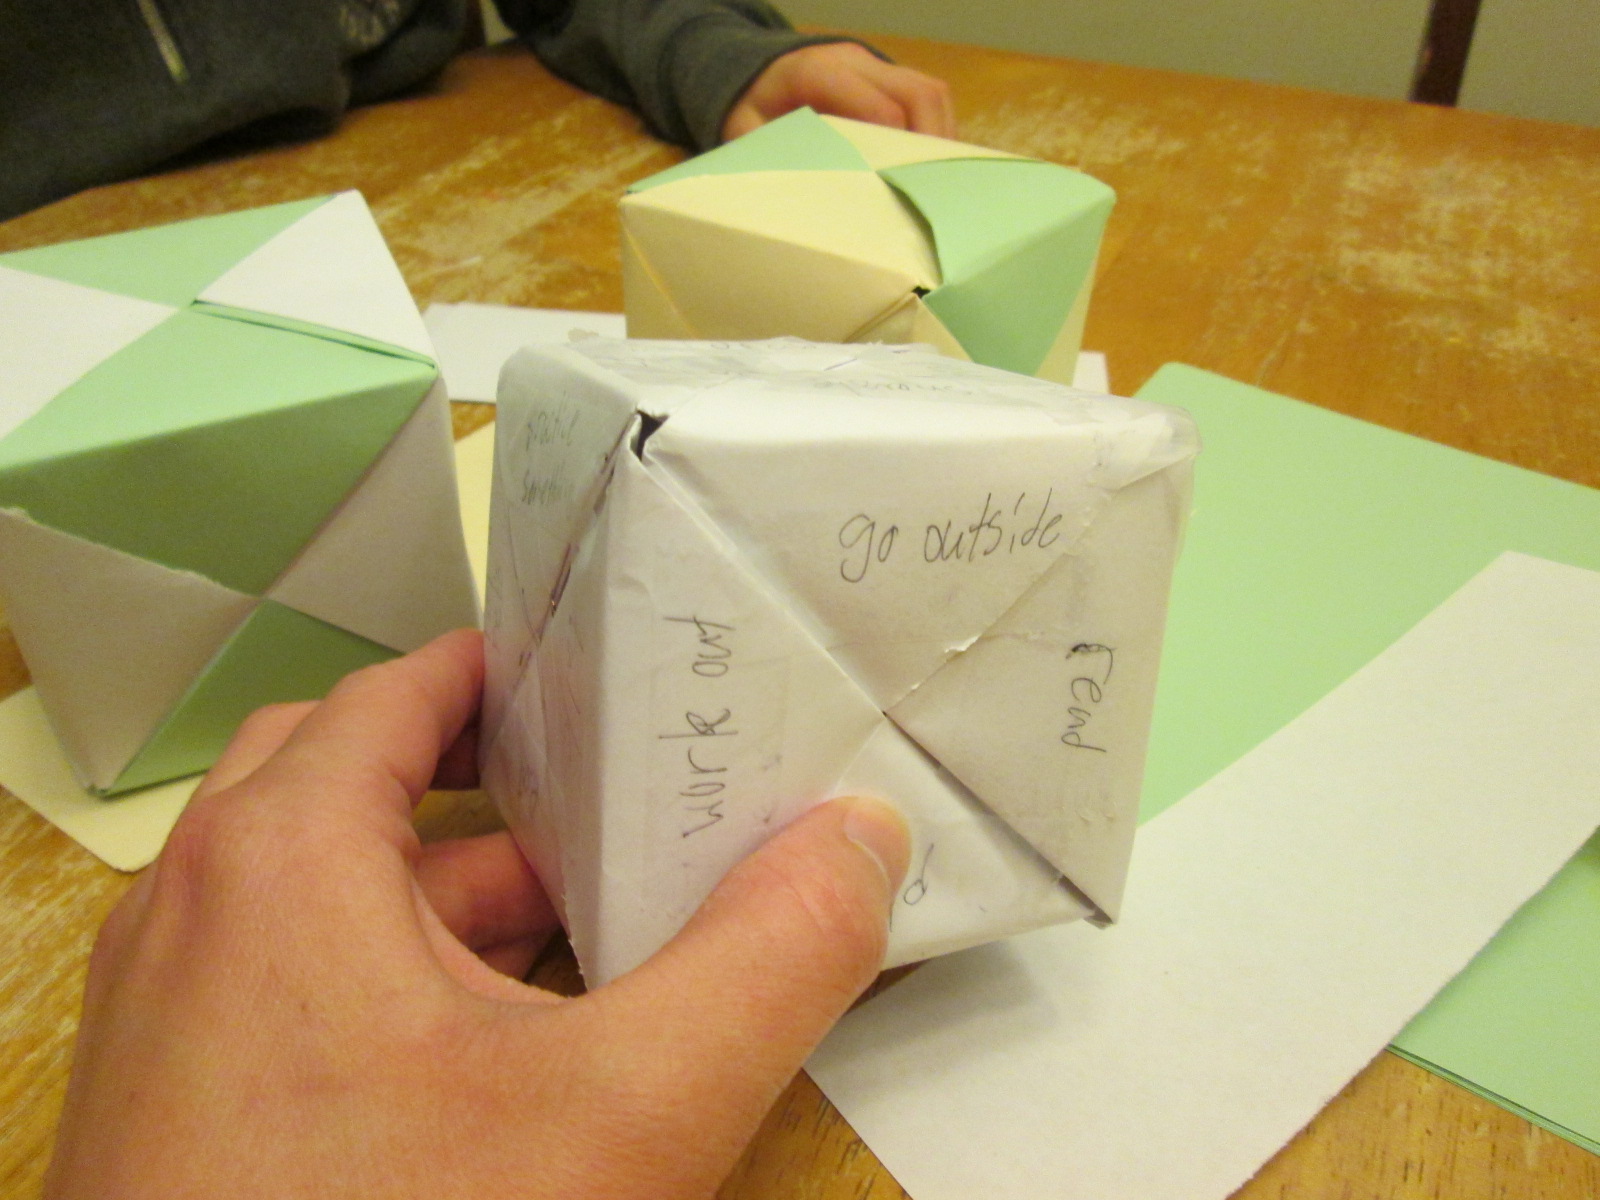
STEP 4: BUILD IT – We’d already built the box, but once we started throwing around the Boredom Buster Box, it was in danger of being destroyed by use. To protect it, Ben put clear tape on the edges to protect and strengthen it. This made a huge difference!
STEP 5: LAUNCH – I like to write stories, and like any writer, I get stuck sometimes. Instead of making a boredom buster box, I made a writer’s box. My box showcased different characters and sent them off on adventures – depending on how the box lands. I love it!
INVENT YOUR STORY! These beautiful boxes can also be used to teach kids fractions (again, that one was Ben’s idea) or they can be strung together to make a fun banner or decoration. Whatever you use this for, it’s a great boredom buster!
Thank you for stopping by. I’d love to find out what you decide to create! Leave a comment if you can, and then go – invent YOUR story! ????