
Getting Organized: Do What Works for You
If I’ve learned anything in my creative endeavors with friends, it’s that we all have a different way of doing things. Some writers plot out their stories. Some writers fly by the seat of their pants. Some people build a puzzle starting with the edge pieces, and other puzzlers start in the middle.
Finding out what works for you is the key to staying motivated with a project.
There’s not a right or wrong way to fold towels. There’s not a right or wrong way to organize an invention center. But it is important to take a little bit of time, consider your organizational style, and put your space together the way you like it.
What makes your creative spirit happy?
Do your insides sing when you see alphabetized DVD’s? Do bins in coordinating colors make you relax and want to create something new? Do quotes by your favorite inspirational leaders keep you moving forward? Let those answers direct how you move forward organizing your invention center.
I recently edited a book by the popular lifestyle blogger Sarah Symonds called Designing a Life: From House to Haven. The bit of magic she unlocks in her book changed my perspective on home décor forever. She uses a 10-step method to help individuals discover their creative style and use it to turn their home into a place of refuge. I highly recommend her book, and I’m applying her principles as I build my invention center. [Noteworthy: I don’t receive financial compensation for pitching Sarah’s book – I just found in genuinely useful and wanted to share it. Also, my center doesn’t reflect her style.]
What fuels my creative spirit?
Junk.
Even better?
Junk inside of junk.
In my invention center, I have a shoebox full of toilet paper rolls ready and waiting. Old grapefruit containers are filled with rocks. Acrylic paint is splattered on the table, and the table itself is made of uneven boards and 2×4’s that I cut in straight (warped) lines with a scroll saw.
If you’ll please notice in the featured picture, the top of the table doesn’t match or fit the bottom. And the cat photobombing my art habitually scatters the oh-so-nicely placed scissors and pliers. I’ll be the first to admit it: my center does need a chair. But it’s my happy place, and I wouldn’t change a thing.
Let your invention center be your happy place, and just do what you do. Because there’s no one in the world who can invent exactly like you.
Until next time,
Invent your story
I did not come up with this idea, but I’ve seen tutorials and was curious if this odd little trick really worked. It does! If you have nail polish around the house that you want to get rid of, this is a great way to put it to use. Here’s how it works:
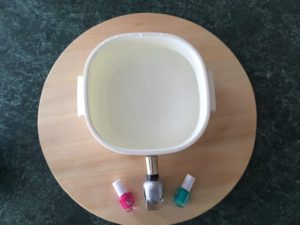
Supplies You Need:
Bowl
Stirring tool (I used a straw)
Nail Polish
Water
Object (white or clear works well) to design
Fill it!
Fill the bowl about halfway with water. You want it deep enough so there’s some distance between the surface of the water and the bottom of the bowl, so you don’t bump it. You can adjust this to your liking.

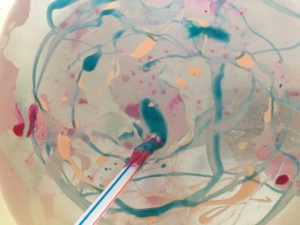
Mix it!
Take your favorite colors, and experiment. You can use as many as you want, although following a color scheme is usually a good idea. The nail polish will float on the surface of the water, and when you have the colors you want inside, go ahead and give it a stir.
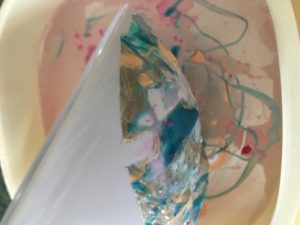
Dip it!
Now’s the fun part. Gently dip and turn your object onto the surface of the water. The nail polish will adhere to it right away! I found that all of the bowl was not covered to my liking with my first turn, so I simply put more nail polish in and did it again!
The project can get a little bit stinky and messy, but the results are fantastic. Plus, it’s a cinch to set up. This little bit of inventiveness is the perfect way to add a splash of color to your life.
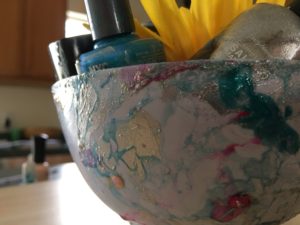
Happy Inventing!