
Fabrics are fantastic. I’m a fan, if not a fanatic. I’m not an expert in textiles, but the beautiful thing about today’s trick is a sewing novice can fabricate flowers. All you need is an imagination and a few tools.
When you start working with different fabric textures and types, you soon discover how shifty and slippery they can be. In this tutorial, I am going to teach you a fool-proof way to have fun with your scraps. I used an old bridesmaid dress that was altered.

You’ll want to grab:
A needle and thread
Scraps of fabric or ribbon (I used polyester)
Scissors
A button or bead (optional)
Make Imperfect Cuts
Decide the shape and size of leaf or petal you want to make, and start cutting. It doesn’t have to be perfect! I follow this rule of thumb with my fabric flowers: plan a design and don’t sweat the little shifts. It’s all part of the art! You can fold the fabric in half to create a more symmetrical shape if you want.

Fold for Textures
The fun thing about working with fabric is you literally can build textures into the piece. When you hold a shape in your hand, it looks flat and lifeless. Give it a fold or two, and suddenly a leaf emerges. Isn’t that amazing?


Layer for Depth
No flower has one petal. Add depth and whimsy to your flowers by giving them at least three layers. I gave mine three and plan to do four for my next flower. You’ll be able to gauge what’s best by playing around with your pieces.

Add the Center
The center of your flower can be a contrasting or coordinating color. You can use a bead, a button, or even create an X with the thread by repeatedly sewing through the center. You’ll want to make at least four stitches to secure it. After tying a knot in the back, your flower is complete.

Unless…
Beauty after Burning

Some fabrics (like polyester) actually melt when you draw a flame close to them. This seals the frayed edges and creates that ridged effect. Detailing your fabric flowers this way adds pizazz to your fantastic fabric garden.

Thank you for journeying through the fabric fields with me today. Happy flower-making, and happy spring! I’m so glad all inventions aren’t made of steel and fiberglass. Some just make me smile. If you liked this adventure, check out watercolor art for more artistic fun.
Until next time,
Invent your story
Welcome Inventors! I wanted to make a good, old-fashioned flower press. When I was in third grade, I went to a camp where we pressed leaves, flowers, and grasses to create leaf collections, art, and cards. I loved it! So, this summer, flower presses were on my bucket list of things to introduce to my kids.
I needed:
1 – 2×4 ft. piece of ½ inch plywood
2 – ¼ in. carriage bolts (4 per press) about 2 inches long,
3 – ¼ in. wingnuts and washers (4 per press)
That was it! I was able to make four 12×12 inch presses – one for each of us! The kids helped, and here’s how:
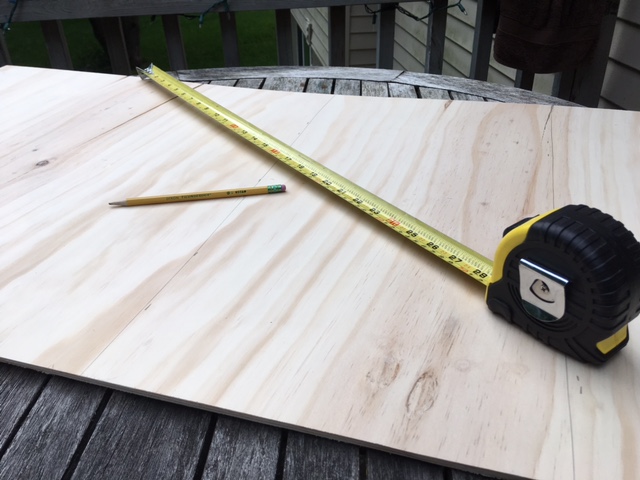
First, I cut the plywood cross-wise into four equal parts. I used a scroll saw because I am a big chicken with circular saws. Once I had my four pieces, I cut them in half again.
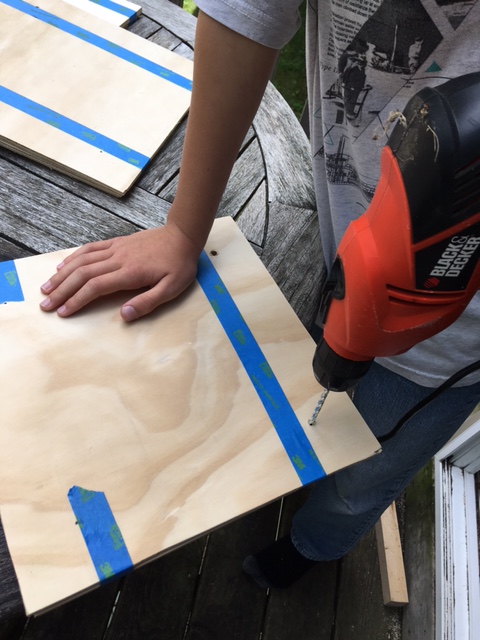
After we had all eight pieces, I let two of the kids sand the edges of their boards with sandpaper. I worked one-on-one with my third kid (in rotation) using a drill with a ¼ inch bit. We painter-taped the boards together and drilled through both at the same time. That ensured our would holes line up even if the measuring and cutting wasn’t perfect. We drilled 4 holes in each board, about 2×2 inches from the corners.
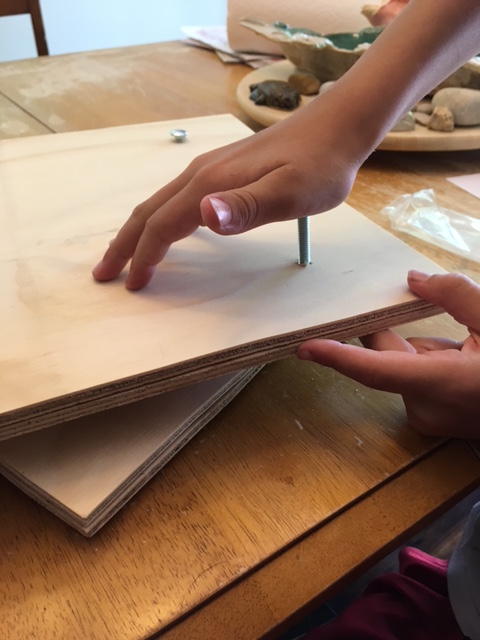
Once each board had the holes, we pressed four carriage bolts through one board. It took some wiggling, but it worked. Carriage bolts have a square under the head of the screw that will press into the wood and keep it from shifting/falling out easily, but regular bolts will also work great.
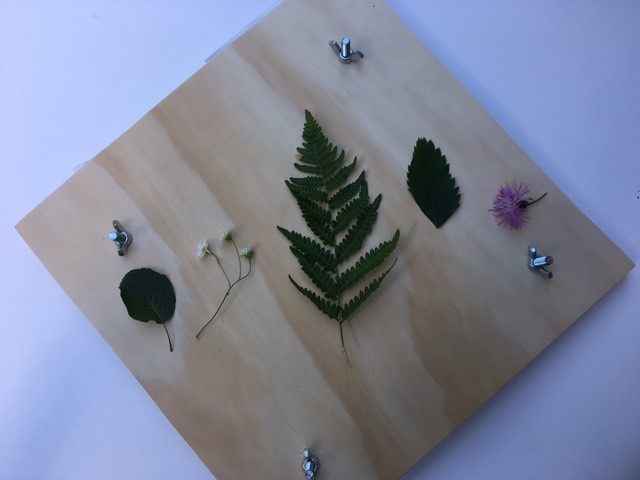
The presses were ready for flowers and leaves. We put newspaper down first and then put the flowers in between paper towel sheets. This was cheaper than using all paper towel, and it prevented newspaper ink from staining our stuff.
When our press was loaded, we put the top board on the other side, and secured each bolt with a washer and a wingnut. We turned the wingnuts until there was a lot of resistance and the board was slightly warped. Drying time from plant to plant can vary, but a good rule of thumb is at least 2 weeks.
My kids and I had fun with these. They’re portable, easy-to-use, and when we make memories in the great outdoors, now we have a special way to keep a piece of them forever. Thank you for visiting, and I hope this encouraged you to invent timeless memories in your story today.